
Landscape Guides & Advice
Practical answers about plants, materials, costs and project preparation for your Lutz or Tampa Bay landscape.
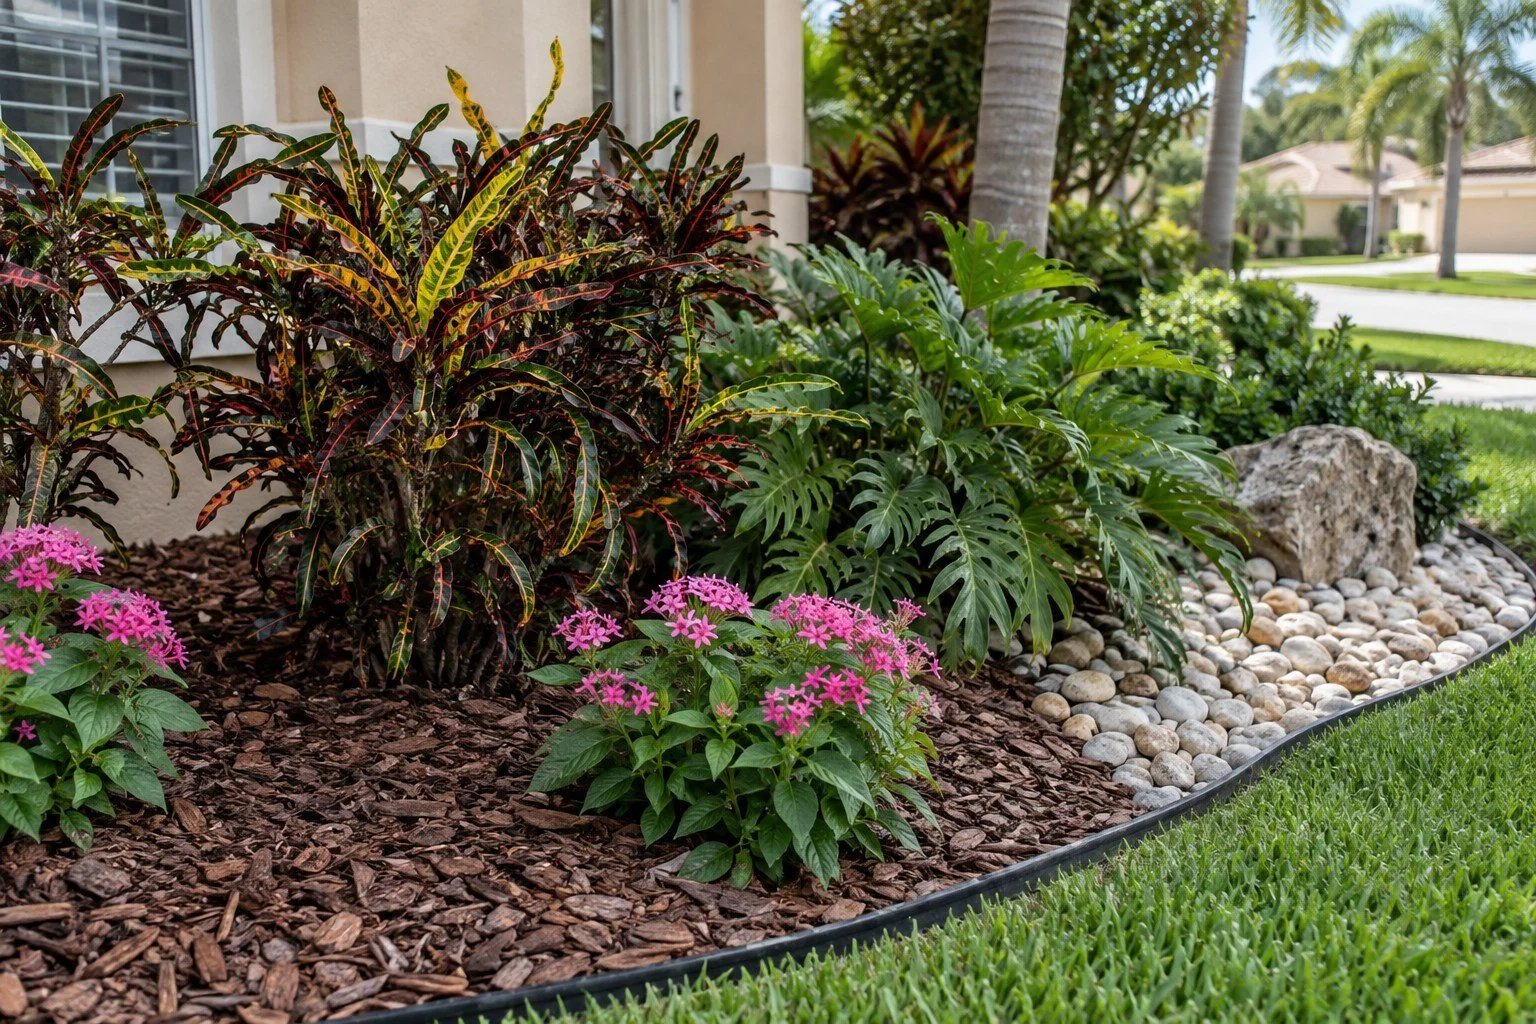
Pine Bark vs. Cypress Mulch
Pine bark or cypress mulch? Compare mini and large pine bark nuggets with cypress mulch for Florida beds: wash-out, slopes, how long each lasts, weeds and color.
Quick answer:
- Mini pine bark is the best all-around choice for most Tampa-area beds: neat, natural, stays in place and lasts.
- Large pine bark nuggets last the longest and look bold in big, flat beds, but float in heavy rain.
- Cypress mulch is shredded, holds on slopes and comes in natural or dyed colors, but UF/IFAS does not recommend it for environmental reasons.
Pine bark and cypress are the two mulches Tampa Bay homeowners ask about most. They look different, behave differently in a summer downpour and age differently in the sun. Piece size matters just as much as the material: mini pine bark and large pine bark nuggets come from the same tree but perform very differently in a real landscape bed. Here is how the three compare, when each one makes sense, and what to watch out for before you order.
Mini pine bark vs. large pine bark vs. cypress
| Mini pine bark | Large pine bark nuggets | Cypress mulch | |
|---|---|---|---|
| Form | Small chunks, roughly ½–1½ in | Large chunks, roughly 2–3+ in | Shredded strands |
| Look | Fine, neat, rich brown | Bold, chunky, rich brown | Natural golden-tan to gray, or dyed |
| Stays in place in heavy rain | Good | Poor, can float | Very good, mats together |
| Slopes | Fair | Not recommended | Good |
| How long it lasts | Good | Very good | Very good |
| Weed suppression | Good, covers evenly | Fair, gaps between pieces | Good, dense layer |
| Color over time | Holds brown, darkens slightly | Holds brown | Natural fades to silver-gray; dyed colors fade |
| Environmental note | By-product of pine timber | By-product of pine timber | Not recommended by UF/IFAS |
| Best for | Most home beds and shrubs | Large beds, tree rings, flat ground | Slopes, windy or wet-edge beds, color options |
Piece sizes vary by supplier. Always compare a current sample.
Mini pine bark mulch
Mini pine bark (often called mini nuggets) is the most versatile of the three. The smaller pieces lie flat, cover the soil evenly and give beds a clean, finished look that suits most Florida homes.
- Pros: natural rich brown color, neat texture that fits small and medium beds, stays in place better than large nuggets, adds organic matter as it breaks down, and pine bark holds its depth well over time.
- Cons: breaks down faster than large nuggets, can still shift in fast-moving water, and needs periodic top-ups.
- Best for: foundation beds, shrub borders, flower beds and most residential landscapes.
Learn more in our mini pine bark mulch guide.
Large pine bark nuggets
Large nuggets are the same material in a much bigger size. They make a strong visual statement and last a long time, but they behave differently in Florida rain.
- Pros: longest-lasting pine bark option, bold texture that suits large beds and tree rings, and fewer top-ups.
- Cons: lightweight nuggets float and wash out during heavy storms, gaps between pieces let some weeds through, looks out of scale in small beds, and can roll onto walkways and lawns.
- Best for: large, flat beds with solid edging, around established trees and palms, and areas away from downspouts and drainage paths.
Cypress mulch
Cypress mulch is shredded rather than chunked. The strands knit together into a mat that stays put on slopes and in windy or wet spots, which is its biggest practical advantage.
- Pros: resists washing out and blowing away, works on slopes, dense layer that holds moisture, and available natural or dyed brown, black and red.
- Cons: natural cypress weathers from golden-tan to gray, dyed colors fade and can stain concrete when fresh, many products are blends of other woods, and UF/IFAS Extension does not recommend cypress mulch because cypress trees grow in Florida's forested wetlands.
- Best for: sloped beds, areas where bark keeps washing away, and designs that call for a specific dyed color.
Which one should you choose?
| If your bed… | Choose |
|---|---|
| Is a typical foundation or shrub bed | Mini pine bark |
| Is large, flat and well edged, or surrounds big trees | Large pine bark nuggets |
| Is on a slope or near a downspout | Cypress (or pine straw) |
| Keeps washing out in summer storms | Cypress or mini pine bark, plus better edging |
| Needs a black or red color | Dyed cypress blend |
| Should be the lowest-impact organic choice | Pine bark |
Installation tips for any of the three
- Depth: spread 2 to 3 inches around established plants. Measure the existing layer first; you may only need to top up an inch.
- Keep it back: pull mulch a few inches away from trunks, plant stems and your home's foundation.
- Skip the fabric under mulch: organic mulch breaks down on top of fabric and weeds root in it anyway.
- Edge the beds: solid edging keeps every mulch, especially large nuggets, out of the lawn.
- Keep it off waterways: organic mulch near storm drains and shorelines can wash nutrients into the water.
- Order the right amount: use the mulch and rock calculator or read how to measure for mulch.
See them in the Showroom
Compare micro, mini and large pine bark along with natural, brown, black and red cypress in the Landscape Showroom, and save your favorites to share with RLC. Still deciding between mulch and stone? Read mulch vs. rock.
Want fresh mulch without the hauling?
RLC removes old material, edges beds and installs pine bark or cypress mulch across Lutz and Tampa Bay. Tell us about your beds and we will recommend the right mulch for each one.
Frequently asked questions
Which lasts longer, pine bark or cypress mulch?
Both hold up well. In a UF/IFAS study comparing six Florida mulches over two years, pine bark and cypress were among the mulches that kept their depth best, and pine bark kept about two-thirds of its original depth after two years. Large pine bark nuggets break down more slowly than mini nuggets.
Does pine bark mulch float away?
Pine bark is lightweight and can float during heavy rain, especially large nuggets. Mini pine bark stays in place better, and shredded cypress mats together and resists washing out. Good edging and keeping beds out of drainage paths help any mulch stay put.
Is cypress mulch bad for the environment?
UF/IFAS Extension does not recommend cypress mulch because cypress trees grow in Florida's forested wetlands and harvesting raises conservation concerns. Many products sold as cypress are blends. If you prefer the look, ask about the product's sourcing, or consider pine bark as an alternative.
Is mini pine bark or large pine bark better?
Mini pine bark suits most residential beds: it gives a finer, neater look, covers more evenly and stays in place better. Large nuggets last longer and look bold in big beds and tree rings, but they float in heavy rain and leave gaps where weeds can sprout.
Which mulch is best for slopes?
Shredded cypress or pine straw holds best on slopes because the pieces knit together. Mini pine bark is second. Avoid large pine bark nuggets on slopes and in areas where water flows.
Does cypress mulch keep termites away?
Do not rely on any mulch for termite protection. Keep all mulch a few inches away from your home's foundation, siding and wooden structures regardless of type.
How deep should pine bark or cypress mulch be?
UF/IFAS recommends a 2- to 3-inch layer around established trees, shrubs and bedding plants, with mulch kept pulled back from trunks and plant stems.
Is dyed cypress mulch safe?
Dyed mulches are colored for appearance, and some dyed wood mulches made from recycled wood can contain treated lumber. Choose products from a reputable supplier and ask what wood the mulch is made from.
Keep planning
- Mulch & Rock CalculatorBags, cubic yards and DIY hours for your beds.
- Mulch vs. RockCost, heat and upkeep compared.
- Rock vs. Mulch Cost ComparisonSee the 10-year cost of each material.
- Landscape ShowroomBrowse mulch, rock, plants and lighting.
Sources: UF/IFAS Extension mulch guidance and the UF/IFAS landscape mulch settling study by Duryea and Minogue.
Types of Sod in Florida: Pros, Cons and How to Choose
Compare the sod types used in Tampa Bay lawns, including Floratam, Palmetto and Bitter Blue St. Augustine, Empire zoysia, Bahia and Bermuda, with pros, cons and how to choose.
Quick answer: most Tampa Bay lawns use one of six sods. Choose by sunlight first, then by how much care you want to give the lawn.
- Full sun, classic lawn: Floratam St. Augustine
- Partial shade: Bitter Blue or Palmetto St. Augustine
- Dense, soft, upscale look: Empire zoysia
- Low budget, low input, large areas: Bahia
- Full sun, heavy foot traffic: Bermuda
Picking sod is one of the few landscape decisions you live with every single week. The right grass fills in quickly, stays thick and handles your yard's sun, water and traffic. The wrong one thins out under the oak tree, browns every dry spring or needs more mowing and treatments than you signed up for. This guide compares the sod types commonly available around Lutz, Tampa and the rest of Tampa Bay, with honest pros and cons for each, a side-by-side table and a simple way to choose.
Florida sod types compared
| Sod | Sun needs | Shade | Drought | Foot traffic | Upkeep | Mowing height | Relative sod cost |
|---|---|---|---|---|---|---|---|
| Floratam St. Augustine | Full sun | Poor | Moderate | Low | Moderate | 3.5–4 in | Moderate |
| Palmetto St. Augustine | Sun to partial shade | Fair | Moderate | Low | Moderate | 3–4 in | Moderate–higher |
| Bitter Blue St. Augustine | Sun to partial shade | Good | Moderate | Low | Moderate | 3.5–4 in | Moderate–higher |
| Empire zoysia | Sun to light shade | Fair | Good | Good | Moderate–high | 1.75–2.5 in | Higher |
| Bahia (Argentine) | Full sun | Poor | Very good (goes dormant) | Moderate | Low | 3–4 in | Lowest |
| Bermuda | Full sun only | Very poor | Very good | Excellent | High | 1–2 in | Moderate |
Mowing heights follow UF/IFAS Extension lawn recommendations. Cost is relative sod price only; your installed price depends on square footage, removal, grading and irrigation.
St. Augustine grass: the Florida standard
St. Augustine is the broad-bladed, thick lawn you see on most Tampa-area homes. It spreads by above-ground runners, establishes quickly from sod and handles Florida heat and sandy soil well. It also tolerates salt better than many grasses. The trade-offs are the same across every St. Augustine cultivar: it needs supplemental water in dry weather, it goes semi-dormant and loses color in winter, it does not handle heavy foot traffic, and its main insect pest is the southern chinch bug. Gray leaf spot and large patch are its most common diseases. Three cultivars cover most yards:
Floratam St. Augustine
Floratam is the most widely used lawn grass in Florida and the default choice for sunny yards. It has a coarse texture, grows aggressively in spring and summer and fills in bare areas quickly.
- Pros: fast establishment and repair, handles heat, widely available, usually the most affordable St. Augustine.
- Cons: poor shade and cold tolerance, coarse blades, and it has lost much of its original chinch bug resistance. It is prone to gray leaf spot in rainy summers.
- Best for: open, sunny front and back yards with working irrigation.
Palmetto St. Augustine
Palmetto is a semi-dwarf St. Augustine with a shorter growth habit, a finer look than Floratam and a lighter green color.
- Pros: handles full sun or partial shade, attractive appearance, slightly shorter growth.
- Cons: still not suited to dense shade, and it is susceptible to the usual St. Augustine insects and diseases. It is sometimes marketed as drought tolerant, but university research has not shown it to be better than other St. Augustines in drought.
- Best for: yards that mix sunny areas with a few hours of shade from the house or young trees.
Bitter Blue St. Augustine
Bitter Blue is a long-established cultivar with a finer, denser texture and a distinctive dark blue-green color.
- Pros: good shade and cold tolerance, dense turf, rich color, proven performance across the state.
- Cons: only slight chinch bug resistance, and like all St. Augustines it needs water in dry weather and wears thin under heavy traffic.
- Best for: yards with oaks, tall palms or buildings that shade the lawn for part of the day.
Empire zoysia: dense, soft and upscale
Empire is the most common zoysia in Florida. It forms a very dense, carpet-like lawn that performs on both sandy and clay soils and holds a nice green color during the growing season.
- Pros: very dense growth that crowds out weeds, good salt and wear tolerance, soft feel underfoot, good shade tolerance for a zoysia and a wide range of compatible weed-control products.
- Cons: slow to green up in spring, builds thatch (especially when over-fertilized), recovers slowly from damage, and is susceptible to large patch disease and hunting billbugs. It is mowed lower than St. Augustine, ideally weekly, and usually costs more.
- Best for: homeowners who want a manicured look, moderate foot traffic and are willing to keep up with mowing and thatch control.
Bahia grass: the low-input option
Bahia (Argentine is the common lawn variety) thrives in full sun on sandy soil with limited water and fertilizer. Its deep, extensive root system survives drought by going dormant.
- Pros: the lowest-cost sod, low fertilizer needs, excellent drought survival, few pest problems and a good fit for large open areas, septic fields and roadside strips.
- Cons: a thinner, more open lawn than St. Augustine or zoysia, browns during drought, tall V-shaped seed heads appear through summer and require frequent mowing, poor shade tolerance, and mole crickets can cause damage. It can yellow in high-pH soils.
- Best for: larger lots, pastures, side areas and budget-conscious projects where a perfect lawn is not the goal.
Bermuda grass: tough, fast and sun-loving
Bermuda is the grass of golf courses and sports fields. It produces a dense, dark green turf that handles wear, drought and salt extremely well and recovers quickly.
- Pros: excellent wear and fast recovery, very good drought and salt tolerance, dense turf that outcompetes weeds.
- Cons: needs full sun, high maintenance (frequent low mowing, more fertilizer), nematodes and mole crickets are serious pests, loses color in winter and spreads aggressively into flower and landscape beds.
- Best for: sunny yards with dogs, kids and heavy use, especially where the owner or a lawn service can keep up with mowing and edging.
How to choose the right sod for your yard
- Measure sunlight. Note how many hours of direct sun each area gets in summer. Six or more hours opens up every option; three to six hours points to Bitter Blue or Palmetto; less than that usually calls for beds instead of grass.
- Check your irrigation. St. Augustine and zoysia look best with a working sprinkler system. Without irrigation, Bahia is the most forgiving.
- Think about traffic. Pets, kids and play areas favor Bermuda or zoysia. St. Augustine thins along regular walking paths.
- Be honest about maintenance. Bermuda and zoysia reward frequent mowing and attention. Bahia needs the least input but frequent summer mowing for seed heads.
- Match the neighborhood and HOA. Many HOAs specify St. Augustine for front yards. Check your rules before choosing Bahia.
- Prepare the soil. Every sod performs better on a smooth, weed-free base. See what to do before installing new sod.
Best sod by situation
| Your situation | Usually the best fit |
|---|---|
| Sunny yard, classic Florida lawn | Floratam St. Augustine |
| Oaks or partial shade | Bitter Blue or Palmetto St. Augustine |
| Manicured, soft, dense look | Empire zoysia |
| Large lot, no irrigation, tight budget | Bahia |
| Dogs, kids and heavy play | Bermuda (full sun) or zoysia |
| Near salt spray or brackish water | Bermuda, zoysia or St. Augustine |
| Dense shade under a canopy | Planting beds or mulch instead of sod |
Caring for new sod
- Water right away and keep the soil moist, not flooded, for the first one to two weeks, then gradually water less often and more deeply as roots grow.
- Stay off it as much as possible until it roots and does not lift when you tug a corner.
- Wait to mow until the sod is rooted, then never remove more than one-third of the blade at a time.
- Hold off on fertilizer for the first several weeks and follow local fertilizer ordinances and watering restrictions.
- Watch for problems such as yellow patches or thinning. Our guide to brown spots in St. Augustine lawns explains common causes.
When sod is not the answer
Deep shade, steep slopes, narrow side yards and areas that never get irrigation are hard on every grass. In those spots, planting beds, mulch or rock can look better and cost less to maintain. For a hard-wearing, always-green area, compare artificial turf and natural sod.
Ready for a new lawn?
RLC installs sod across Lutz, Land O' Lakes, Wesley Chapel, Odessa, Tampa and the surrounding area, from sod on clean dirt to full lawn tear-out and replacement. We will help you match the grass to your sun, irrigation and budget.
Frequently asked questions
What is the most common sod in the Tampa Bay area?
Floratam St. Augustine is the most widely installed lawn grass in Florida. It grows quickly, fills in fast and handles heat well, but it needs roughly six or more hours of direct sun and is not a good choice for shady yards.
What is the best sod for shade in Florida?
Shade-tolerant St. Augustine cultivars such as Bitter Blue and Palmetto handle partial shade better than Floratam, Bahia or Bermuda. No lawn grass grows well in dense shade, so heavily shaded areas are often better as planting beds or mulch.
What is the lowest-maintenance sod in Florida?
Bahia is the lowest-input choice. It needs less fertilizer and survives dry spells by going dormant, but it is less dense, turns brown in drought, sends up tall seed heads in summer and does not tolerate shade.
Is zoysia better than St. Augustine?
Neither is better everywhere. Empire zoysia forms a very dense, soft, carpet-like lawn with good salt and wear tolerance, but it greens up slowly in spring, builds thatch and recovers slowly from damage. St. Augustine establishes and recovers faster and is easier to maintain at a normal mowing height.
Which sod is best for dogs and kids?
Bermuda and zoysia handle foot traffic best. Bermuda recovers fastest from wear but needs full sun and frequent mowing. St. Augustine has poor wear tolerance, so worn paths often thin out.
Which sod needs the least water?
Established Bahia and Bermuda handle dry periods best. Bahia survives drought by going dormant and turning brown until rain returns. All new sod needs regular watering for the first few weeks while roots establish.
Can I mix different types of sod in one yard?
You can use different grasses in separate areas, such as a shade-tolerant St. Augustine under trees and Floratam in full sun. Avoid mixing species in the same lawn area because they grow at different rates, colors and mowing heights, which makes the lawn look patchy.
How long does new sod take to root in Florida?
In warm weather, new sod typically starts rooting within about two weeks and is usually well rooted in four to six weeks. Establishment takes longer in cool months or when sod is installed on poorly prepared soil.
Keep planning
- Sod InstallationClean-dirt installs and full lawn replacement.
- Landscape ShowroomCompare sod types side by side and save favorites.
- Before Installing New SodPrep steps that decide how well sod roots.
- Artificial Turf vs. Natural SodCost, heat and upkeep compared.
Sources: UF/IFAS Extension lawn publications on St. Augustinegrass, zoysiagrass, bahiagrass and bermudagrass.
How to Measure for Mulch and Rock (With a Free Calculator)
Step-by-step instructions for measuring rectangles, curves, tree rings and slopes, choosing the right depth, and converting square feet into bags, cubic yards and tons, plus a free mulch and rock calculator.
Quick answer: measure each bed's length and width in feet, multiply to get square feet, then use this formula:
Square feet × depth in inches ÷ 324 = cubic yardsA 200 sq ft bed at 3 inches deep needs about 1.85 cubic yards. That is roughly 25 bags of mulch or 100 half-cubic-foot bags of rock. Add about 10% extra, or let the calculator below do all of it for you.
Ordering the right amount of mulch or rock sounds simple until you are standing in a garden center aisle guessing how many bags go into a curved front bed. Order too little and the job stops halfway through a Saturday. Order too much and you are storing a pallet of bags beside the garage. This guide explains exactly how to measure landscape beds, how to handle curves, tree rings and slopes, how deep each material should go in Florida, and how to turn your measurements into bags, cubic yards and tons.
Use the free mulch and rock calculator
Enter your beds below. The results update as you type and include the weight you will lift and the hours the job usually takes.
1. Your beds
Curved bed? Measure the longest length and the average width. Close is good enough.
2. What you'll need
- Area covered0 sq ft
- Volume (incl. 10% extra)0 cu ft
- Total weight to lift0 lb
- Car or SUV trips from the store0
- Wheelbarrow loads0
- Weed fabric0 sq ft
- Materials at your bag price$0
Estimates only. Bags assume 2 cu ft mulch and 0.5 cu ft rock; weights and work times are typical, not guaranteed. RLC confirms exact quantities on site.
Prefer a full-screen version? Open the standalone Mulch & Rock Calculator.
How to use the calculator, step by step
- Pick mulch or rock. The material changes the bag size, the weight and how much you can carry per trip.
- Choose the type. Pine bark, cypress and dyed mulch weigh about the same. River rock, limestone and pea gravel are heavy; lava rock is much lighter.
- Set the depth. Three inches is the default for new mulch beds and most rock beds. Use 1–2 inches when you are only topping up.
- Add each bed. Use Rectangle for straight beds, Circle for tree rings, or I know the sq ft if you already measured. Tap Add another bed for every separate area.
- Check the extras. Removing old material, laying weed fabric and adding edging all add real work, so the time estimate goes up.
- Enter a bag price (optional). Use the shelf price at your store to see material cost.
- Read the results. Bags are best for small jobs; cubic yards are what bulk suppliers and contractors use. Copy my numbers saves everything to paste into an estimate request.
What you need to measure a landscape bed
- A 25-foot or 100-foot tape measure (a long tape makes curves much easier)
- A few stakes, flags or even screwdrivers to mark corners
- Your phone for notes or a quick sketch
- A ruler or trowel handle to check the depth of existing mulch or rock
You do not need survey-level accuracy. Measuring to the nearest half foot is plenty for ordering material.
Step 1: Sketch the yard and number every bed
Walk the property and draw a rough map: front foundation beds, beds along the driveway, tree rings, side yards, the strip beside the pool cage and any area around the AC unit. Number each area. Separate beds get separate measurements, even if they will use the same material. This prevents the most common ordering mistake, which is forgetting a small bed until the pile runs out.
Step 2: Measure each bed by its shape
Rectangles and straight strips
Measure the length and the width and multiply them. A 40 ft × 5 ft foundation bed is 200 square feet. Measure width from the house or edge to where the bed meets the lawn, not to the drip line of the shrubs.
Curved, kidney and free-form beds
Run your tape along the longest line through the bed. Every 3 to 5 feet along that line, measure the width straight across. Add those widths and divide by how many you took to get an average width, then multiply by the length. A 30-foot curved bed with widths of 4, 6, 7, 6 and 3 feet has an average width of 5.2 feet, so it is about 156 square feet.
L-shaped and wraparound beds
Split the bed into two or more rectangles where it turns the corner. Measure each rectangle separately and add them together. Do not count the corner twice.
Triangles and wedge-shaped corners
Measure the base and the height, multiply them and divide by 2. A corner bed with a 10-foot base and an 8-foot depth is 40 square feet.
Circles and tree rings
Measure straight across the circle for the diameter. Divide by 2 for the radius, multiply the radius by itself, then multiply by 3.14. An 8-foot tree ring has a 4-foot radius: 4 × 4 × 3.14 = about 50 square feet. For a half-circle, divide the result by 2. On a large oak, subtract the area of the trunk.
Slopes and berms
Measure along the surface of the slope, not the flat distance across it. A mounded bed has more surface than it looks like from above, and material on slopes tends to wash to the bottom, so add a little extra.
Areas with obstacles
Subtract anything large that will not be covered: an AC pad, a pool equipment slab, a big boulder or a concrete splash block. Small items like irrigation heads and plant bases do not need to be subtracted.
Step 3: Choose the right depth
| Material and situation | Depth | Why |
|---|---|---|
| New mulch bed (pine bark, cypress, dyed) | 3 inches | Enough to block light to weed seeds and hold moisture in sandy Florida soil. |
| Refreshing existing mulch | 1–2 inches | Tops up color without piling mulch against stems. Check the existing depth first. |
| Mini pine bark nuggets | 2–3 inches | Small nuggets knit together well and float less than large nuggets. |
| Pine straw | 3–4 inches when fluffed | Settles quickly to about 2 inches. |
| River rock ¾"–1½" | 2–3 inches | Must fully hide the fabric underneath; larger stone needs the full 3 inches. |
| Pea gravel and small stone | 2 inches | Small stone covers more evenly at less depth. |
| Lava rock | 2–3 inches | Lightweight, so it can shift in heavy rain. |
Keep mulch a few inches away from tree trunks, palm bases, shrub stems and siding. The University of Florida's guidance on mulching landscape plants recommends maintaining a layer of about two to three inches and avoiding mulch piled against plant bases.
How to check the depth you already have
Before topping up, push a ruler, screwdriver or trowel straight down through the mulch until you hit soil in several spots. If you already have 2 inches of mulch in good condition, you only need about 1 inch more to reach 3 inches. Many homeowners add a full 3 inches every year and end up with 6 or more inches, which can keep soil too wet and starve roots of air. For rock, rake a small patch aside: if you can see fabric, you need more stone in that area.
Step 4: Convert square feet to cubic yards
Landscape materials are sold by volume. Here is the full conversion:
Square feet × (depth in inches ÷ 12) = cubic feet Cubic feet ÷ 27 = cubic yardsOr use the shortcut: square feet × depth in inches ÷ 324 = cubic yards.
| Depth | One cubic yard covers | 100 sq ft needs | 500 sq ft needs |
|---|---|---|---|
| 1 inch | 324 sq ft | 0.31 cu yd | 1.54 cu yd |
| 2 inches | 162 sq ft | 0.62 cu yd | 3.09 cu yd |
| 3 inches | 108 sq ft | 0.93 cu yd | 4.63 cu yd |
| 4 inches | 81 sq ft | 1.23 cu yd | 6.17 cu yd |
Step 5: Convert to bags or bulk
| Unit | Volume | Per cubic yard | Coverage at 3" |
|---|---|---|---|
| Bag of mulch (most common) | 2 cu ft | 13.5 bags | About 8 sq ft per bag |
| Large bag of mulch | 3 cu ft | 9 bags | About 12 sq ft per bag |
| Bag of decorative rock | 0.5 cu ft | 54 bags | About 2 sq ft per bag |
| Bulk mulch or rock | 1 cu yd | 1 yard | About 108 sq ft |
Step 6: Add extra for waste and settling
Add about 10 percent. Uneven soil, low spots near downspouts, material that spills onto the lawn and mulch that settles after the first heavy rain all use more than a flat measurement suggests. The calculator already includes this.
Worked examples from typical Tampa Bay yards
Front foundation bed with mulch
A 45 ft × 5 ft bed across the front of a Wesley Chapel home is 225 sq ft. At 3 inches: 225 × 3 ÷ 324 = 2.08 cubic yards. With 10% extra that is 2.3 cubic yards, or about 31 bags of mulch weighing roughly 1,000 pounds in total.
Three palm and tree rings
Three 6-foot rings are about 28 sq ft each, or 85 sq ft total. At 3 inches that is about 0.8 cubic yards with extra, roughly 11 bags.
Side yard rock strip
A 50 ft × 4 ft strip beside the house is 200 sq ft. At 3 inches of river rock that is about 2 cubic yards with extra, or around 110 half-cubic-foot bags. That stone weighs more than 5,000 pounds and would take five or six loaded trips in an SUV, which is why most homeowners do not bag rock for areas this size.
How heavy is mulch and rock?
| Material | Weight per cubic yard (approx.) | Per bag |
|---|---|---|
| Pine bark or cypress mulch | 400–600 lb (more when wet) | 20–40 lb per 2 cu ft bag |
| River rock | 2,500–2,800 lb | About 50 lb per 0.5 cu ft bag |
| Pea gravel | 2,700–2,900 lb | About 50 lb per 0.5 cu ft bag |
| Lava rock | About 1,000 lb | About 20 lb per 0.5 cu ft bag |
Weight matters for hauling. Many half-ton pickups are rated to carry less than one cubic yard of river rock, and a single yard of stone can exceed the payload of most SUVs. Check your vehicle's payload rating before loading up.
Common measuring mistakes
- Measuring to the plant canopy instead of the bed edge. The bed is usually wider than the shrubs.
- Forgetting small areas. Tree rings, mailbox beds and AC pads add up quickly.
- Adding a full new layer over old mulch. Check the depth first so you do not bury plant stems.
- Using the wrong bag size. Rock bags hold a quarter of what mulch bags hold.
- Skipping bed prep. Grass and weeds left under mulch grow right back through it.
- Rock without fabric or edging. Stone sinks into sandy soil and migrates into the lawn without a barrier and a solid edge.
Should you do it yourself or hire it out?
Small beds and yearly mulch touch-ups are a very reasonable DIY project. The math changes as the job grows. A few cubic yards of mulch means dozens of bags loaded, unloaded and carried, and rock multiplies the weight several times over. Removing old material, cutting in fabric and setting edging usually take longer than spreading the new layer.
If the calculator shows a full weekend or more, it is worth comparing that time against a professional installation. RLC Lawn & Landscape handles bed cleanup, fabric, edging, delivery and spreading across Lutz, Land O' Lakes, Wesley Chapel, Odessa, Trinity and Tampa.
Want it measured and installed for you?
Send us your numbers from the calculator, or we can measure on site. We will recommend the right material and depth for each bed.
Frequently asked questions
How do I calculate how much mulch I need?
Multiply the bed's length by its width to get square feet, multiply by the depth in inches, then divide by 324. The result is cubic yards. For bags, multiply cubic yards by 13.5 to get the number of 2-cubic-foot bags.
How many square feet does a cubic yard of mulch cover?
About 108 square feet at 3 inches deep, 162 square feet at 2 inches and 324 square feet at 1 inch.
How many bags of rock equal a cubic yard?
A cubic yard is 27 cubic feet, so it takes 54 bags of 0.5-cubic-foot rock. At about 50 pounds per bag, that is roughly 2,700 pounds of stone.
How do I measure a curved or kidney-shaped bed?
Measure the longest length, then measure the width every 3 to 5 feet along that line and average the widths. Multiply the length by the average width. For odd shapes, split the bed into rectangles, triangles and half-circles and add them together.
How do I measure a round tree ring?
Measure across the circle to get the diameter. Divide by 2 for the radius, then multiply the radius by itself and by 3.14. An 8-foot tree ring is about 50 square feet. Subtract the trunk area on large trees.
Should I order extra mulch or rock?
Yes. Add about 10 percent for uneven ground, spillage and settling. Fresh mulch settles and breaks down, and low spots always take more material than a flat measurement suggests.
How deep should mulch be around plants in Florida?
Two to three inches is the common recommendation for established beds, with mulch kept a few inches away from trunks, stems and your home's foundation.
Is it cheaper to buy mulch in bags or bulk?
Bags are convenient for small beds. Past about 2 cubic yards, bulk delivery usually costs less per yard and saves dozens of trips, but it needs a place to dump the pile and a lot of wheelbarrow work.
Keep planning
- Pine Bark vs. Cypress MulchMini and large pine bark compared with cypress.
- Rock vs. Mulch 10-Year CostCompare upfront price against yearly re-mulching.
- Mulch vs. Rock GuideHeat, upkeep, leaves and where each works best.
- All Tools & CalculatorsCalculators, previews and the Showroom in one place.
- Landscape ShowroomSee mulch, rock and edging options before you choose.
Measurements and weights are typical estimates for planning. Actual bag volumes, material weights and settling vary by product and moisture.
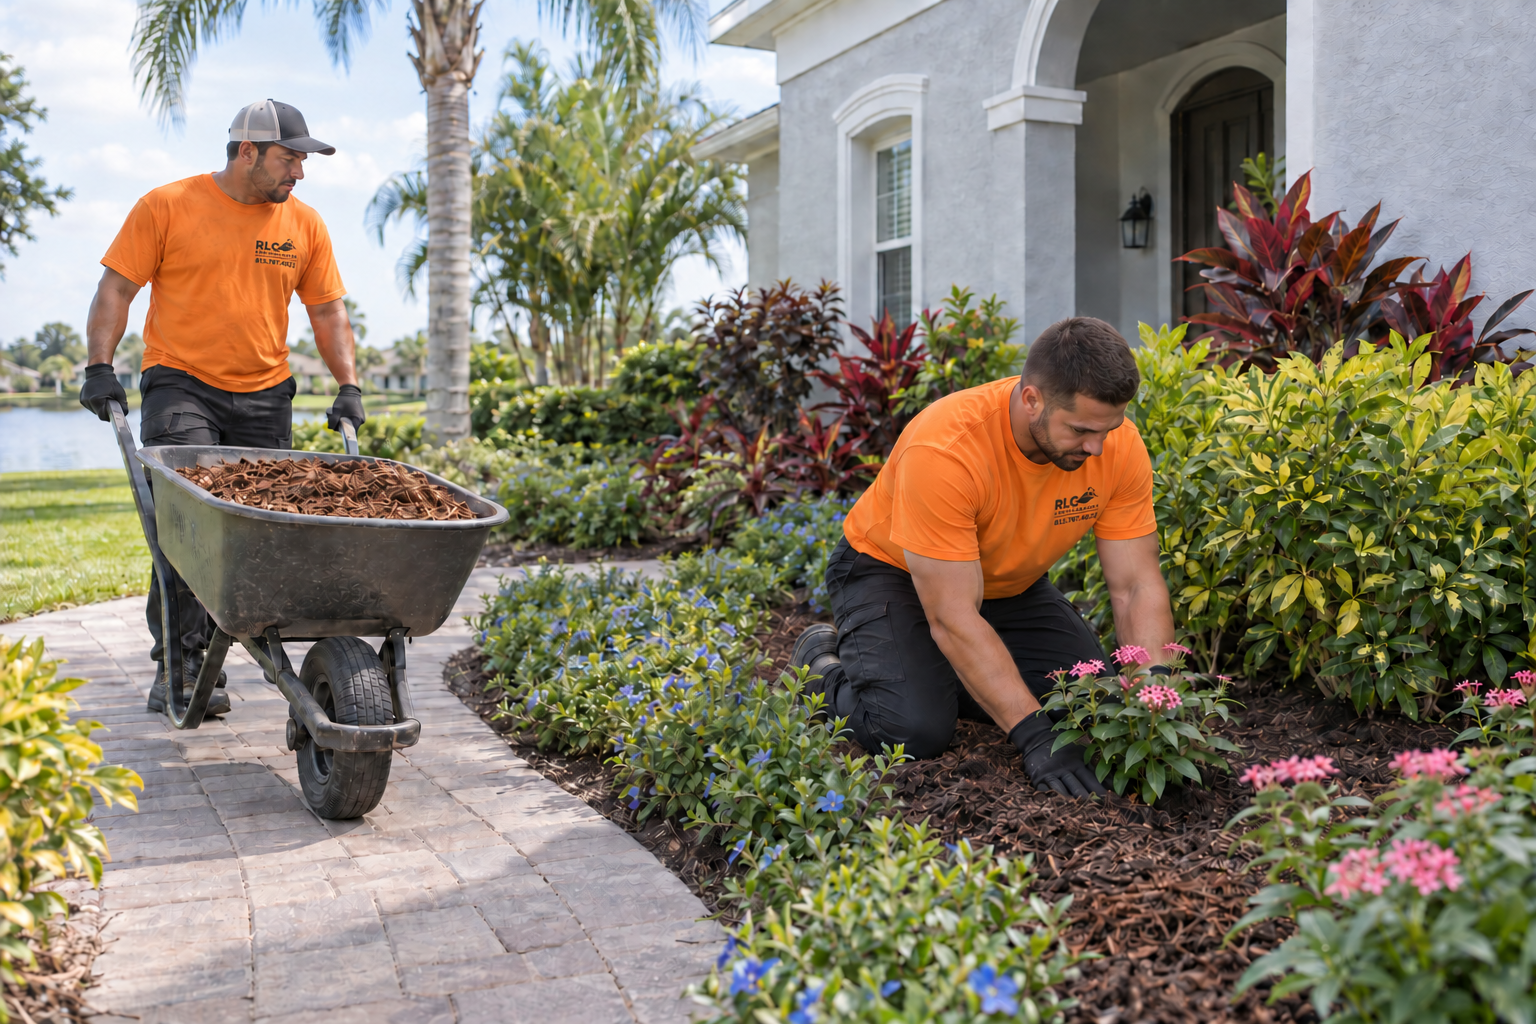
Is Professional Landscaping Worth It Compared With DIY?
Compare the full effort of DIY landscaping with professional installation, including heat, hauling, preparation, equipment and avoiding repeat work.
Professional landscaping is most useful when a project requires coordinated preparation, heavy material handling, plant or site knowledge, and a reliable finish. DIY can be sensible for a small, accessible task you understand and enjoy. Compare the complete job, including tools, delivery, hauling, your time, and the consequences of having to redo it.
In Tampa, the difference between an enjoyable morning in the yard and an exhausting unfinished project can be substantial. Heat is one factor, but project sequencing and material logistics often matter just as much. The right choice depends on the work, not on a rule that every homeowner should hire or do everything alone.
Define the finished result before comparing prices
“Add some plants” can mean anything from placing a few small specimens in a prepared bed to removing old shrubs, changing the bed outline, adjusting irrigation, and installing a complete landscape. Write down what completion looks like.
Include the less visible work: removal, preparation, disposal, edge details, and care after installation. A nursery receipt is not directly comparable to a proposal that includes all those steps. Conversely, a professional quote should clearly say what it leaves out.
Count the whole DIY workload
Measuring and choosing materials.
Researching plant suitability and mature size.
Buying, borrowing, or renting tools.
Collecting materials or arranging delivery.
Removing old material and preparing the site.
Moving everything from the delivery point to the work area.
Installation, cleanup, and disposal.
Checking the result and caring for new planting.
A narrow gate or long route around the house can make handling more demanding than the garden size suggests. Heavy stone, rooted shrubs, and repeated trips with a wheelbarrow are different tasks from planting a few small pots.
Consider the cost of an incomplete sequence
A common source of wasted effort is doing visible finishing work too early. New mulch may need to be moved for irrigation repairs. Fresh lawn may be crossed for a later removal job. Plants chosen before the bed is measured may not fit the final layout.
A coordinated plan puts disruptive work before finishing work and accounts for access. Even if you do part of the project yourself, deciding on the sequence first can prevent repeated handling and avoidable damage.
When DIY is a reasonable choice
DIY is often practical when the task is small, the area is accessible, the materials are manageable, and you understand what is involved. You may enjoy maintaining an established bed, adding a suitable accent plant, or carrying out a clearly defined part of a larger plan.
Be honest about available time and comfort with the work. If the project must be spread over several weekends, consider whether plants, materials, and unfinished areas can be managed properly between sessions. A realistic schedule is better than treating fatigue as a planning problem you can ignore.
When professional help adds more value
Professional help becomes more useful as the work involves multiple systems or difficult logistics: larger removals, bed reshaping, palms, sod, irrigation changes, lighting coordination, or substantial hauling. It can also help when previous attempts keep failing and the cause has not been addressed.
The value should be visible in the proposal and execution, not assumed from the word “professional.” Ask for an explanation of the layout, materials, scope, and handoff. Do not infer credentials, insurance, or guarantees without checking what the contractor actually provides.
Compare proposals fairly
Give contractors the same goals and property information. Compare plant sizes and quantities, preparation, disposal, access, irrigation work, ground cover, and finishing details. Ask how unexpected conditions and changes in scope will be handled.
For selection and scope-writing principles, UF/IFAS provides guidance on choosing landscape contractors and writing clear landscape contracts. It is written for community associations, but the emphasis on clear expectations is useful when a homeowner compares work.
Can you split the work?
Yes, if responsibilities are agreed in advance. You might clear personal items, identify plants to keep, or handle a separate maintenance task while the contractor completes the installation. Confirm what condition the site must be in and when your portion must be finished.
Avoid a split that creates uncertainty. If one party prepares the ground and another installs sod, both need to agree on preparation expectations. The same applies to irrigation readiness and who is responsible for establishment care.
Use a decision checklist
Do I know what is causing the current problem?
Can I complete the preparation and finishing, not just the easy part?
Can I handle the materials and access safely and comfortably?
Do I have time to complete the sequence without repeated disruption?
Would an error be inexpensive to correct or require major rework?
Is the professional scope clear enough to compare with my plan?
Common questions
Do I need a complete renovation to hire RLC?
No. Explain the specific improvement you want and the property conditions. The scope can be discussed around your priorities rather than assuming every inquiry is a whole-yard project.
Is the lowest quote always the best value?
Only if the scope and expected result are comparable. Missing preparation, hauling, or follow-up can change what the final project actually costs and delivers.
What if I simply do not want to spend weekends in the heat?
That is a valid reason to seek help. A useful estimate lets you decide what completing the work is worth to you, with clear expectations about the result and remaining upkeep.
Plan the next step with RLC
RLC Lawn & Landscape is based in Lutz and serves Tampa-area homeowners. Tell us what is difficult about your yard, what you want to keep, and what you would like to change. We can discuss the landscape work that fits your property and priorities.
Request a free landscape estimate or call (813) 767-4022.
Related planning guides
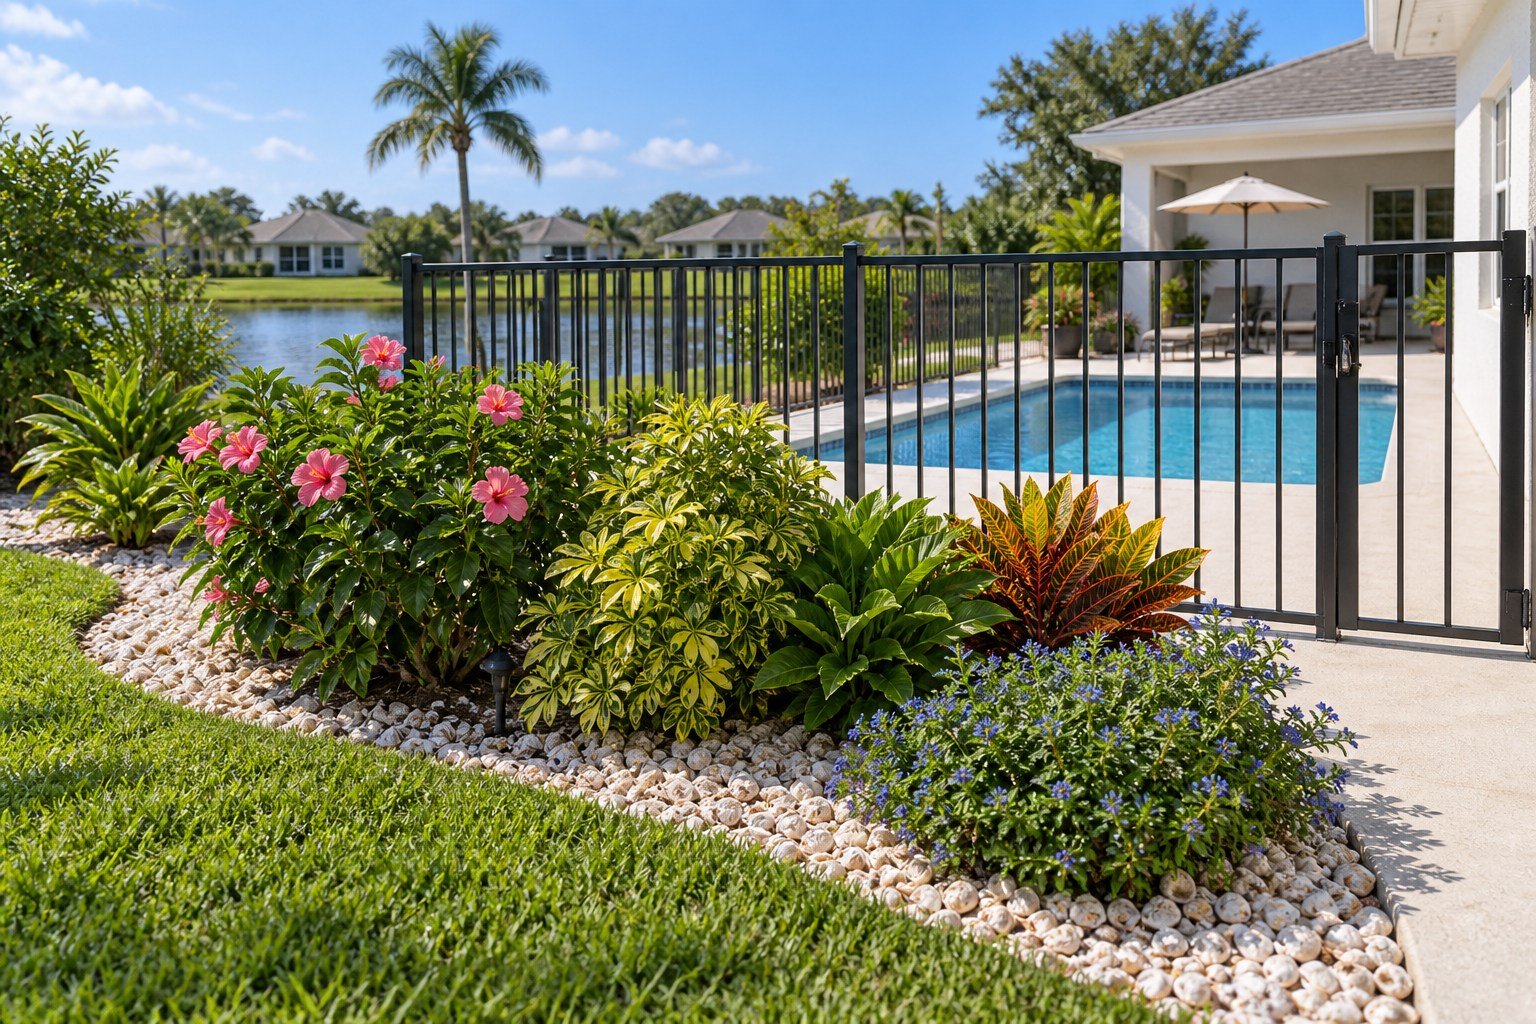
What Landscaping Works Best Around a Pool in Tampa?
Plan tropical planting around an existing Tampa pool with room for access, privacy, cleanup and proper bed edges. Learn what to include in your estimate.
Good poolside landscaping balances privacy and tropical appeal with clear access, manageable plant size, and a realistic cleanup routine. Choose plants for the available light and space, keep equipment and gates accessible, and contain mulch or stone so it stays in the bed. The goal is a comfortable landscape around an existing pool, not plants crowded against every edge.
A pool area is used differently from a front yard. People walk barefoot, move furniture, carry equipment, and look outward from seating areas. The planting should support those activities while framing the views you want to enjoy.
Start with access and the existing pool layout
Mark gates, doors, equipment, drains, screen-enclosure access, and the paths used for maintenance. Keep required pool barriers and their operation intact. Confirm applicable requirements before making changes near them; planting is not a substitute for a pool safety barrier.
Ask how a crew and materials will reach the bed. A narrow route beside a screen enclosure may limit equipment and increase hand handling. Protecting existing surfaces and access should be part of the installation discussion.
Plan privacy from the places you actually sit
Stand or sit where you normally use the pool area. Identify whether the unwanted view comes from a neighboring window, a side yard, or the street. Screening the correct sightline can be more useful than surrounding the entire area with a very tall hedge.
Allow enough planting width for the chosen hedge and future maintenance. A full screen needs a location where it can grow without constantly pressing into fencing, screens, or circulation space. Discuss starting plant size and the appearance you can expect while it fills in.
Choose tropical plants for the site, not only the look
Foliage color, plant form, and a limited number of accents can create a tropical feel. In suitable locations, ti plants and other tropical ornamentals may contribute color. Palms need room for their mature crown and practical maintenance access, so select the species and position carefully.
UF/IFAS notes that poolside plants must be considered for litter, mature size, and exposure to occasional splash, and that no plant is immune to heavy chlorine or saltwater exposure. Its poolside planting guide is a useful resource. Do not direct pool discharge into ornamental beds or assume a plant will tolerate repeated chemical exposure.
Be realistic about leaves and cleanup
Every living landscape requires some care. Ask what the proposed plants shed and how they will be reached for maintenance. A plant that is attractive beside a large open yard may create an inconvenient cleanup job beside a pool or screen.
Consider the surrounding property too. Leaves from existing trees can collect in stone and between plants regardless of what is installed in the new bed. Leave room to work, and avoid a design that depends on reaching through dense planting to clean a narrow strip.
Mulch, shell, or decorative stone?
Compare materials by appearance, movement, cleanup, and future changes. Mulch may need replenishment; shell or stone is heavier to move and can collect debris. The choice should match the planting and the way the area is maintained.
A defined border helps keep loose material from migrating onto lawn or walking surfaces. Ask about the edge detail, finish levels, and how existing drainage paths will be preserved. Do not solve a material-containment problem by creating a new obstruction to water movement.
Coordinate irrigation and lighting
Review how new planting will be watered and whether existing spray conflicts with the pool area or enclosure. New plants need an establishment plan even when the final design is intended to be simple to maintain.
Landscape lighting can highlight planting and support the experience after dark, but placement should respect paths, gates, and glare from seating positions. Electrical and pool-related requirements need the appropriate qualified professional; a landscape concept is not an electrical installation plan.
What belongs in a landscape estimate?
The specific planting areas around the existing pool.
Plants retained, removed, and installed, with sizes and quantities.
Privacy goals and available hedge width.
Ground-cover material and containment details.
Access, protection, and debris removal.
Any irrigation or landscape-lighting work included.
Establishment care and ongoing maintenance expectations.
Be clear that landscaping around an existing pool is separate from pool construction, pool repairs, or replacing its surfaces and barriers. Separate scopes help you compare proposals and involve the right contractors.
Common questions
Can a small pool area feel tropical without being crowded?
Yes. A restrained plant palette and carefully placed accents can be more effective than filling every available gap. Mature dimensions should guide the layout.
Should I use artificial turf beside the pool?
Compare the specific location, drainage, edge detail, surface heat, and maintenance needs. It is not automatically the best option simply because it stays green.
Can I add privacy without losing all the openness?
Often the design can focus on specific views rather than creating a continuous wall. Identify the sightlines first, then select planting to fit them.
Plan the next step with RLC
RLC Lawn & Landscape is based in Lutz and serves Tampa-area homeowners. Tell us what is difficult about your yard, what you want to keep, and what you would like to change. We can discuss the landscape work that fits your property and priorities.
Request a free landscape estimate or call (813) 767-4022.
Related planning guides
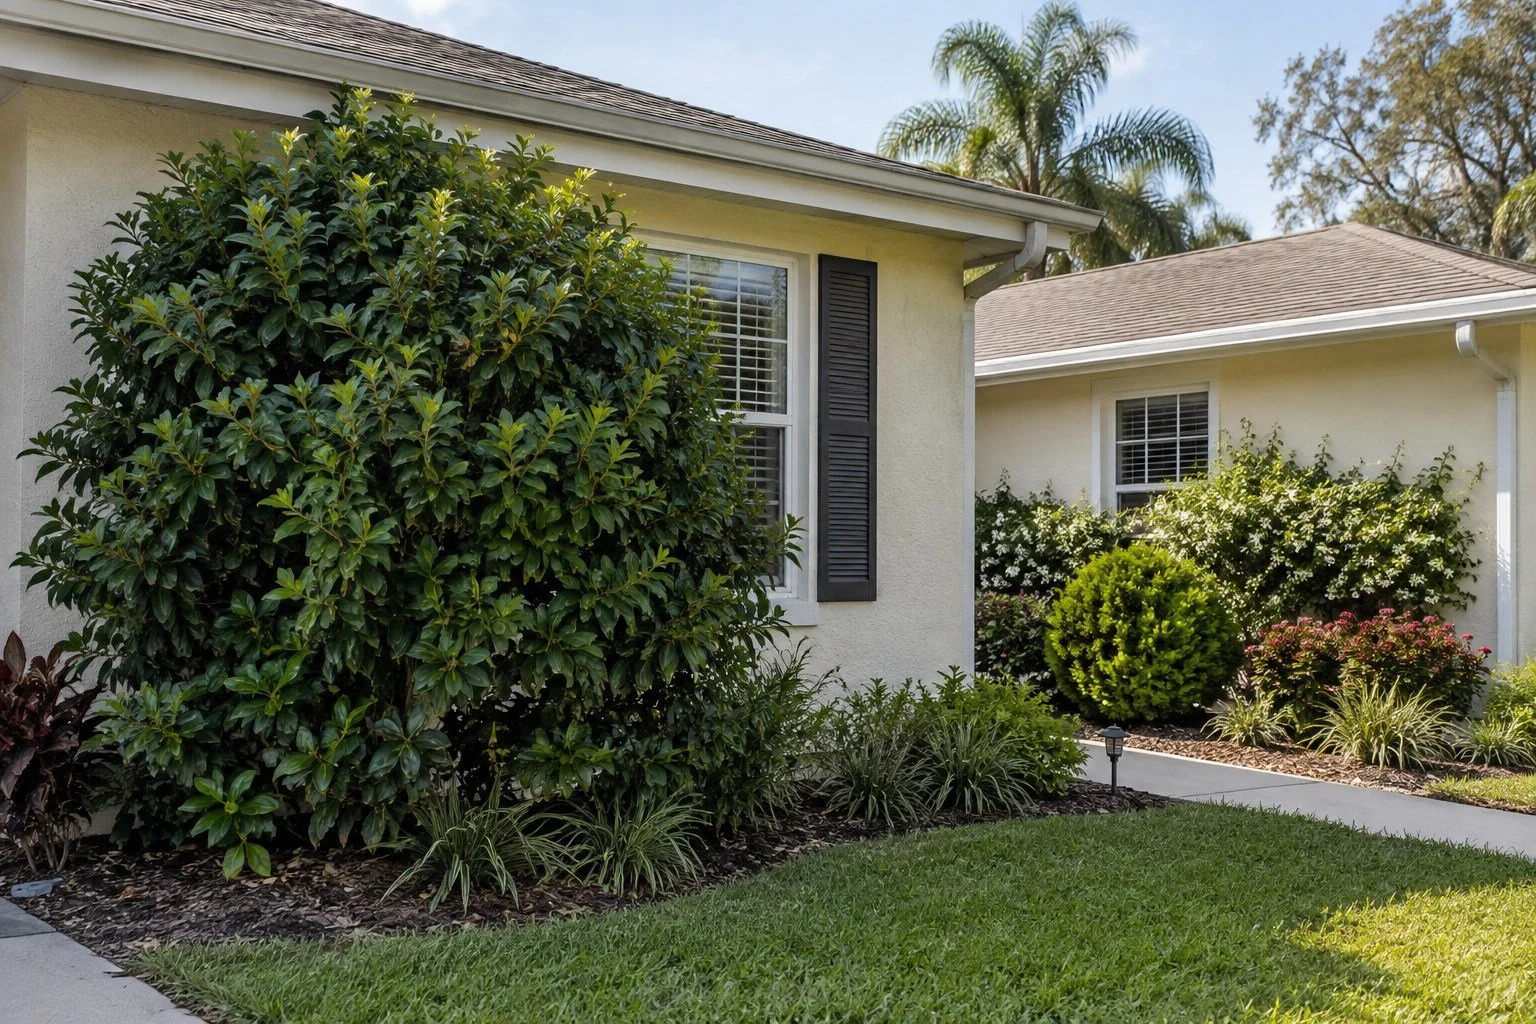
Should You Prune or Replace Overgrown Shrubs Around Your House?
Decide whether oversized foundation shrubs can be restored or should be replaced. Plan mature size, access, removal and new planting for a Tampa home.
Keep an overgrown shrub when it is healthy, suited to the location, and capable of responding well to appropriate pruning. Consider replacement when its mature size conflicts with the space, it repeatedly blocks access, or restoring it will not solve the layout problem. Plant identification is essential before choosing a severe cutback.
Many Tampa homes inherit landscaping selected years earlier. Shrubs that once looked proportional can eventually cover windows, crowd the entry, or hide equipment. The decision is not simply whether a plant can be cut smaller. It is whether the plant can remain useful without creating the same problem again.
Identify the plant and the job it should perform
Is the shrub meant to screen a view, frame an entrance, sit below a window, or form a low border? Compare that role with its actual growth habit. A large privacy plant may be useful along a boundary but inconvenient in a shallow foundation strip.
Check the available width, not just height. Also consider whether the plant is healthy throughout or has only a thin outer shell of foliage. A site visit can help distinguish an appearance problem from poor placement or declining condition.
When might pruning be the better option?
Pruning may be appropriate when the plant fits the location, enough room exists for future growth, and the species responds to the proposed method. Selective work can retain established structure and avoid the disruption of removal.
Ask what the shrub will look like immediately afterward and how long the recovery process may affect the appearance. Some approaches are gradual. UF/IFAS discusses renovation and rejuvenation methods and cautions that aggressive renovation does not suit every shrub in its pruning guide. Do not apply one hard-cutting rule to every plant around the house.
When does replacement make more sense?
The plant is fundamentally too large for the bed.
Frequent trimming is needed to keep a walkway, window, or equipment clear.
The plant is unsuitable for the light or moisture conditions.
The design needs a different height, width, or function.
The proposed recovery leaves a result you do not want to maintain.
Replacement should solve a specific problem. Ask for the mature dimensions and intended spacing of new plants so the next installation does not recreate the old one.
Look at the entire bed before removing one plant
One oversized shrub may be part of a larger layout issue. Removing it can expose gaps, uneven plant heights, buried edging, or irrigation that no longer matches the bed. Conversely, a healthy neighboring plant may be worth protecting and incorporating into the new arrangement.
View the bed from the street and from inside the home. Decide where you want openness and where screening is useful. A coordinated plan can retain privacy without covering every window.
What makes removal more involved?
Size above ground is only part of the job. Roots, access, nearby irrigation, lighting cables, retained plants, and disposal all affect the work. A narrow side gate or bed beside a structure may require more careful handling than an open area.
Clarify whether the proposal includes only cutting the plant down or preparing the location for replacement planting. These are different outcomes. Do not dig around uncertain services or pull large rooted plants with improvised vehicle arrangements.
Choose replacements for the finished space
Start with the available height and width, then match the plant to the site. Select a small number of compatible plants rather than buying individual specimens without a layout. Consider a lower front edge, selected foliage color, and structural planting where it has enough room.
A Florida-inspired look can include appropriate palms, crotons, ti plants, liriope, or other suitable material, but each must be selected for its actual location. A photograph is inspiration, not proof that every plant shown will work in your yard.
Include the finishing work
After removal and planting, the bed still needs a coherent edge, appropriate ground cover, and a watering handoff. Check whether existing sprinkler heads are blocked or misplaced relative to the new arrangement. Keep access to equipment and paths clear as plants grow.
Ask what will happen to old mulch, decorative stone, or damaged edging. A complete scope should leave you with a usable bed, not a new plant surrounded by the remains of the old installation.
Questions to ask before deciding
What species is this, and how should it respond to pruning?
Will it fit the location after recovery and regrowth?
What will the immediate appearance be?
What removal and preparation are included if it is replaced?
What mature size and maintenance are expected from the replacement?
Should all the shrubs be the same height?
Not necessarily. The design should respond to windows, entrances, screening needs, and plant habits. Uniform cutting is not a substitute for a layout.
Can I replace shrubs in stages?
Often, yes. Plan the full bed first and retain clear access so the later work does not damage completed planting.
Plan the next step with RLC
RLC Lawn & Landscape is based in Lutz and serves Tampa-area homeowners. Tell us what is difficult about your yard, what you want to keep, and what you would like to change. We can discuss the landscape work that fits your property and priorities.
Request a free landscape estimate or call (813) 767-4022.
Related planning guides
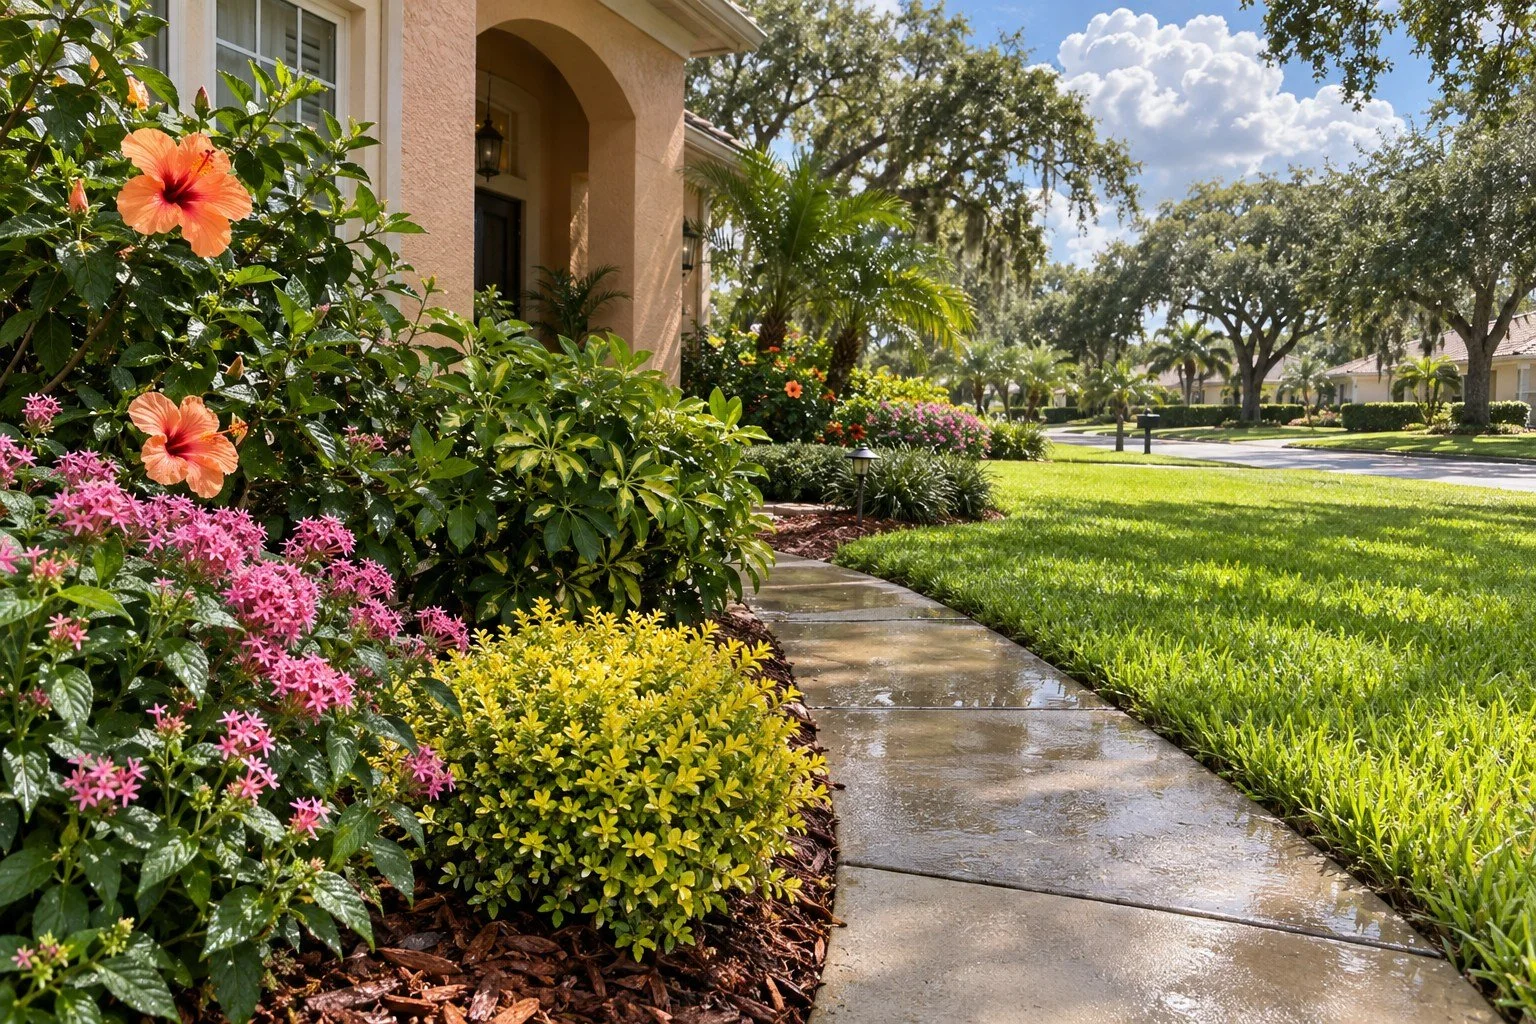
When Is the Best Time to Landscape in Tampa, and Is Summer Too Hot?
Plan Tampa landscaping around heat, rain, plant establishment and your schedule. Learn when to install and what to arrange before work starts.
The best time to landscape in Tampa depends on the plants, current weather, irrigation readiness, and who will care for the installation afterward. Summer is not automatically off limits, but heat and changing rain conditions make planning important. Choose a workable installation and establishment plan rather than relying on one supposedly perfect month.
Many homeowners reach this question after a weekend project becomes exhausting. The work includes more than planting: removal, material handling, preparation, hauling, and cleanup all happen outside. A professional crew may make a larger project more manageable, but the plants still need suitable conditions and follow-up care.
Separate planning season from planting conditions
You can develop a layout, obtain estimates, and decide on scope before the installation window. That gives you time to identify retained plants, discuss access, compare materials, and arrange any approvals that apply to the property.
The actual installation date should account for the forecast, site conditions, plant availability, and the ability to water and monitor the new landscape. A calendar date does not guarantee rain or suitable ground conditions.
What makes hot weather more demanding?
Heat affects the people doing the work and the care required after installation. Long sessions of digging and hauling can be difficult for a homeowner who is not accustomed to that workload. Breaking the job into small pieces may be sensible, but make sure partially completed areas will remain usable and manageable.
For shrubs, UF/IFAS identifies hot, dry weather as a particularly difficult planting condition and emphasizes the ability to water regularly. Its planting and establishment guide explains why follow-up care belongs in the plan. Rain should be observed, not assumed to have met every new plant’s needs.
What should be ready before delivery?
A confirmed bed layout and list of plants to retain.
Access for materials, equipment, and debris removal.
Known irrigation problems addressed.
A plan for handling delivery and installation without unnecessary delays.
Someone responsible for checking the landscape afterward.
A way to contact the installer if a problem appears.
This is especially important if you travel, work long hours, or cannot regularly inspect the property. Discuss those constraints before agreeing on an installation date.
Does rainy weather make the project easier?
Rain can affect watering needs, but it can also complicate access and scheduling. Soft or saturated areas may limit equipment use, and work may need to be adjusted to protect the property. Ask how weather delays are handled and which parts of the job can proceed independently.
Do not expect a rain forecast to replace an establishment plan. Conditions vary within the same yard, and new planting should be checked where it is actually installed.
What about cooler months?
Cooler working conditions may be more comfortable, but plant selection and current weather still matter. Discuss cold exposure for tropical accents, the timing of specific work, and whether the planned lawn or planting has special establishment considerations.
A good contractor should explain why the proposed timing fits the actual scope. A cleanup, irrigation repair, palm installation, and sod replacement do not all have identical scheduling needs.
How to phase a larger landscape project
Start with the overall layout and the work that could disturb finished areas. Removal and access-heavy tasks should be coordinated before delicate planting and final ground cover. Irrigation and lighting routes should be considered before beds are completed.
If the project must be spread out, choose a phase that leaves the yard functional. For example, complete one defined area and its necessary supporting work rather than scattering unfinished tasks across the property. Confirm whether the later phase will require crossing newly completed lawn or beds.
What should you ask a contractor about timing?
What conditions could cause the work to be rescheduled?
How will plant delivery and installation be coordinated?
What irrigation checks happen before completion?
What care do I need to provide afterward?
What should I photograph or report if the landscape looks stressed?
Which tasks are included in follow-up and which are separate?
These answers are more useful than a promise that a particular season is always best. They show whether the installation and its handoff have been thought through.
Common questions
Should I wait until the yard looks worse before calling?
No. Planning can happen before the work becomes urgent. Early assessment may help separate an immediate repair from a larger future improvement.
Is professional installation only worthwhile for a huge project?
No. Access, material weight, removal needs, and coordination can make a defined smaller project difficult. Ask about a scope that fits your priorities.
Can I simply plant everything over several weekends?
You can phase suitable work, but consider delivery, preparation, unfinished areas, and care between sessions. If each weekend begins by redoing the previous one, a coordinated installation may be more practical.
Plan the next step with RLC
RLC Lawn & Landscape is based in Lutz and serves Tampa-area homeowners. Tell us what is difficult about your yard, what you want to keep, and what you would like to change. We can discuss the landscape work that fits your property and priorities.
Request a free landscape estimate or call (813) 767-4022.
Related planning guides
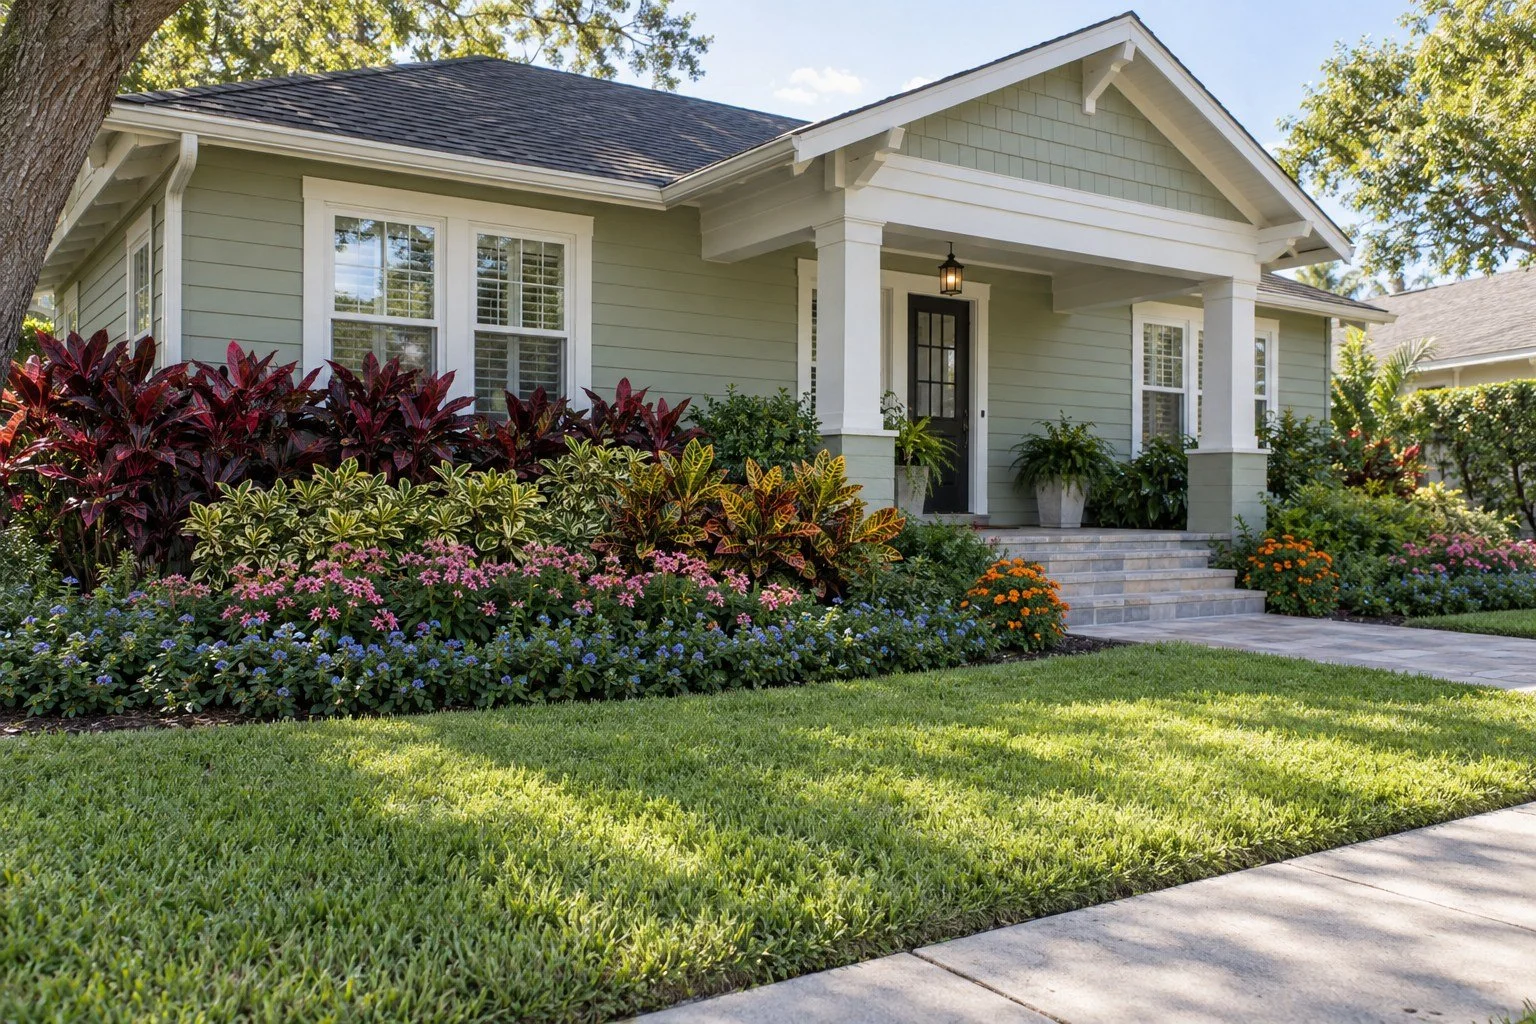
How Can You Improve Front Yard Curb Appeal Without Starting Over?
Plan a front yard refresh that keeps useful plants and improves beds, color, lawn edges and lighting. A practical curb appeal guide for Tampa homeowners.
Improve curb appeal by correcting the most visible layout problems before replacing the entire landscape. Recover clear bed lines, keep the entrance easy to see, remove or address unsuitable plants, and use a coordinated mix of structure, lower planting, and selected color. A front yard refresh can be substantial without becoming a complete demolition.
The best starting point is the view you see every day: arriving in the driveway, walking to the door, and looking out from the house. A landscape can photograph well from the street yet feel awkward when plants block a turn or the walkway disappears behind a hedge.
Review the front yard from three viewpoints
Take photos from the street, the driveway, and the entrance. Look for the features that should remain visible, including the front door, architectural accents, and house number. Note windows, garage clearance, utility equipment, and the route visitors actually use.
Then inspect the details close up. Are there ragged lawn strips beside the house? Do beds end abruptly? Is decorative stone drifting into grass? These small transitions often determine whether the whole yard feels finished.
Keep the plants that are doing their job
A healthy, appropriately placed palm or established shrub can provide structure for a refreshed design. Identify what is worth keeping before choosing additions. Removing every mature plant can leave the home exposed and spend budget on replacing useful features.
Retention is not always the right choice. A plant that repeatedly blocks a window or requires severe trimming may be poorly suited to the location. Ask whether selective pruning, relocation where practical, or replacement is the better long-term decision.
Make the bed layout coherent
Consider how planting connects along the front of the house and around corners. Continuous, intentional beds can make scattered plants feel like one design. Leave enough room for maintenance and future growth, with clear space at paths and the garage.
Avoid adding isolated accents simply to fill every empty spot. Open lawn and visible architecture can be part of the composition. The bed outline should support how the property is used, not compete with the driveway or force visitors to step around plants.
Build a simple planting hierarchy
Use larger structural plants where scale and clearances allow, medium plants to connect the composition, and lower planting near visible edges. This is a design framework, not a rule to put tall plants against every wall. Windows, utilities, and mature spread take priority.
In an appropriate Tampa site, a plan might use a palm as an accent, selected crotons or ti plants for foliage color, and lower liriope in suitable locations. Exact selections should follow sunlight, space, moisture, and exposure rather than copying a photograph plant for plant.
UF/IFAS describes landscape design as something that changes as plants grow and people use the space. Its landscape design resources are a useful reminder to plan for the mature yard, not just installation day.
Use color deliberately
Choose a limited set of accents and repeat them where they help the design. A bed filled with unrelated colors and shapes can feel busy even when each plant is attractive. Consider the house exterior, surrounding greenery, and what will remain visible throughout the year.
Color does not have to come from frequent seasonal replacement. Foliage can provide contrast, but the right plant still needs the right location and enough room. Ask what the planting will look like after it grows and how much trimming that appearance requires.
Finish the ground plane and edges
Fresh ground cover can improve the appearance of prepared beds, but it should follow decisions about plants, irrigation, and boundaries. Review existing material depth and the transitions to the lawn and walkway. A tidy finish should not cover problems that will need to be reopened later.
If the lawn needs repair, address the cause before adding sod. If lighting is part of the refresh, coordinate fixture and cable placement before the beds are finished. Lights should support the entrance and selected landscape features without creating obstacles.
Choose the right project size
A modest refresh might focus on the entrance beds and a visible lawn edge. A larger project might connect the entire front landscape, replace oversized shrubs, adjust irrigation, and add lighting. Compare these as different scopes rather than expecting one price to answer every version.
When phasing, complete the hidden or disruptive work first. Avoid installing a finished bed where later access for a palm or removal job will be needed.
Questions for an estimate
Which plants are retained and why?
What will the bed boundaries look like?
What mature sizes and clearances are planned?
Are irrigation, hauling, and finishing included?
What care will the new planting need?
Will a refresh increase my home value?
A cared-for landscape can improve presentation and enjoyment, but a specific resale return cannot be promised. Plan around the property’s needs and your goals rather than an invented percentage.
Can I keep the driveway and walkway?
Yes. A planting-focused refresh can work around existing surfaces. The important part is keeping transitions and access intentional.
Plan the next step with RLC
RLC Lawn & Landscape is based in Lutz and serves Tampa-area homeowners. Tell us what is difficult about your yard, what you want to keep, and what you would like to change. We can discuss the landscape work that fits your property and priorities.
Request a free landscape estimate or call (813) 767-4022.
Related planning guides
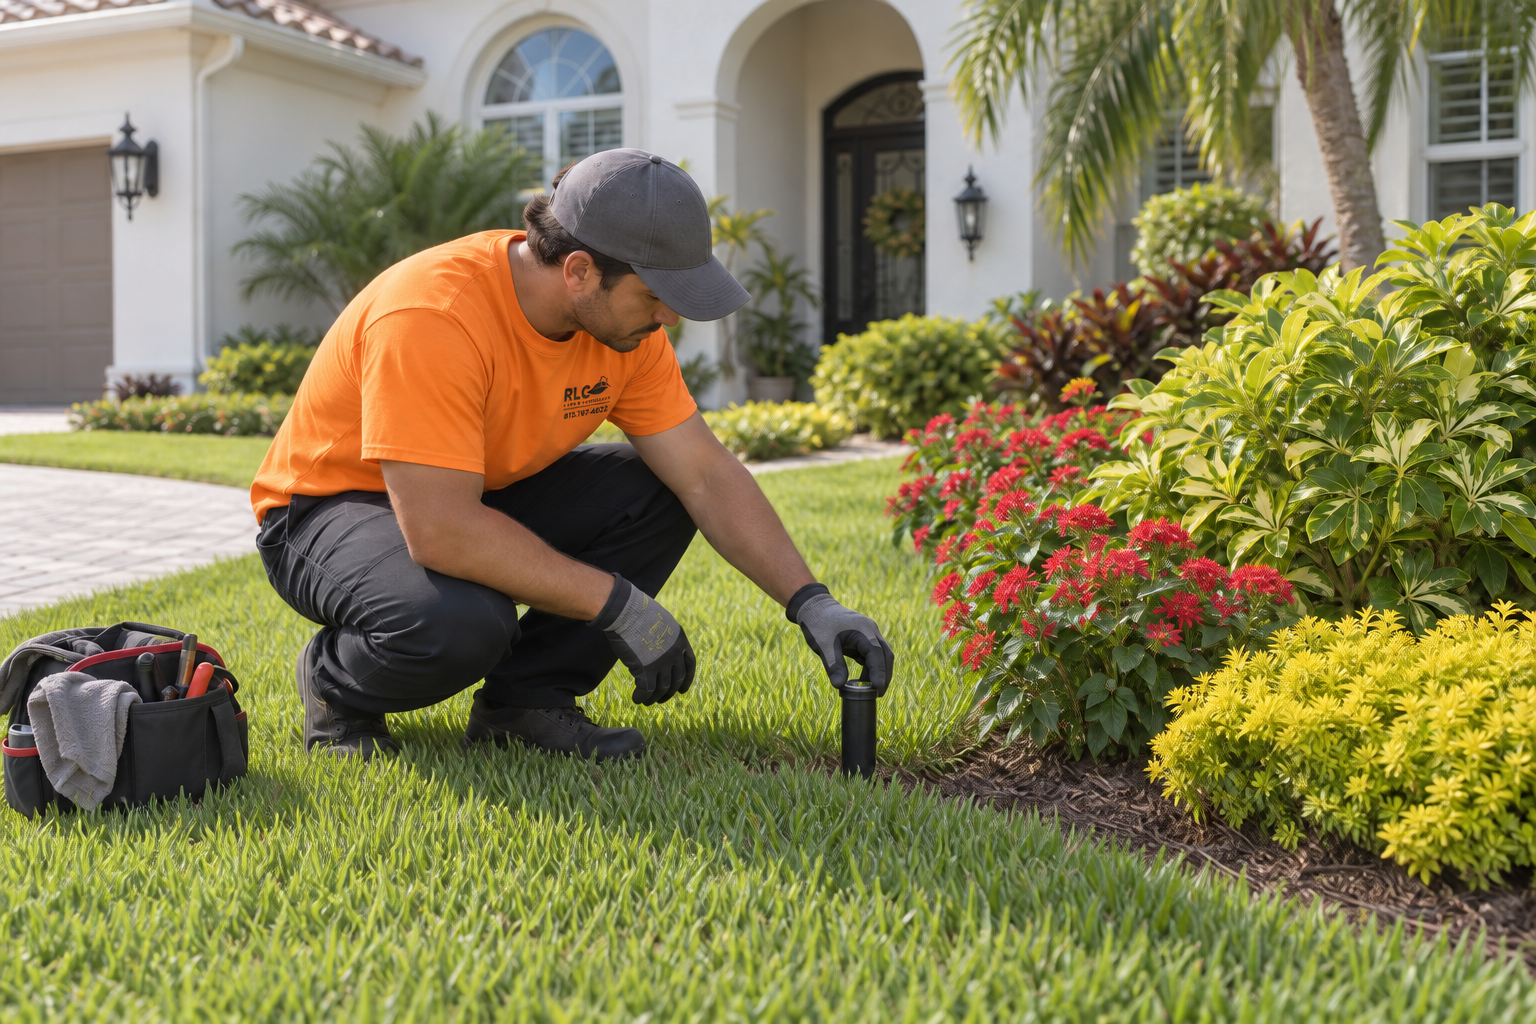
How Do You Know If Your Sprinkler System Needs Repair?
Dry spots, pooling and overspray can signal irrigation problems. Learn what to check and what a useful sprinkler repair assessment should include.
Uneven lawn color, persistent wet spots, broken spray patterns, and water landing on pavement are reasons to inspect an irrigation system. A controller that turns on normally does not prove the system is watering the landscape correctly. Check the actual performance of each zone before changing schedules or replacing plants.
For a Tampa or Lutz homeowner, irrigation problems often become visible only after the lawn or planting starts struggling. Catching the mechanical or layout issue early can help avoid spending money on plants that will face the same conditions.
Start with visible signs
One part of a zone looks dry while another stays wet.
A head is buried, leaning, broken, or failing to rise.
Water is spraying the sidewalk, driveway, wall, or street.
New shrubs or an existing hedge block the spray.
A zone does not start, will not stop, or performs differently from before.
Water continues collecting in a location after the system should be off.
These observations help narrow the investigation, but they do not prove which part needs replacement. A low-pressure-looking zone, for example, should be assessed as a system rather than treated as a request to change every sprinkler head.
Observe one zone at a time
If you can operate the controller comfortably, use a brief test consistent with local requirements and the equipment instructions. Watch the zone from a safe position and record the problem locations. Avoid opening electrical equipment, making uncertain valve changes, or digging around unmarked services.
Take photos or a short video of the spray pattern. Note the zone number and whether the issue is constant or intermittent. This gives the person assessing the system a useful starting point and helps distinguish an equipment fault from a scheduling concern.
Why increasing the runtime may not solve it
More runtime cannot straighten a tilted head or remove a shrub blocking its spray. A dry area caused by poor distribution may remain dry while another area receives too much. Controller changes should follow an understanding of coverage and actual landscape needs.
UF/IFAS recommends periodic testing, attention to malfunctioning heads, and correcting alignment. Its irrigation maintenance guide is a helpful reference. The appropriate schedule still depends on the site, weather, and current watering rules.
Consider what changed in the landscape
New beds, larger plants, lawn replacement, and changes in grade can alter how an existing system performs. A sprinkler that once watered open grass may now be inside a hedge. A new strip of lawn may sit beyond the original coverage. Heavy work can also leave components displaced or damaged.
When planning a renovation, include an irrigation review before final planting and again as part of the handoff. It is easier to coordinate head placement with a bed layout than to work around completed planting afterward.
What should a repair assessment include?
Ask what was observed, which components are affected, and what the proposed repair is intended to correct. A useful explanation connects the symptom to the work: for example, repositioning a head to clear new planting or replacing a damaged component and retesting the zone.
Zones tested and any areas that could not be evaluated.
Visible leaks, damaged heads, coverage conflicts, or control issues.
Parts and labor included in the proposed work.
Whether digging, restoration, or additional investigation is separate.
A performance check after the repair.
Any remaining limitations or recommended follow-up.
Repair scope may change if a buried problem is discovered. Ask how that will be communicated before additional work proceeds. Clear boundaries are more useful than a vague promise to “fix the sprinklers.”
When is a broader update worth considering?
If the landscape has changed substantially or several areas have repeated problems, ask whether piecemeal repairs still make sense. A broader update should be justified by findings and the current layout, not simply by the age of the equipment.
Compare a targeted repair with any proposed redesign. Discuss which areas benefit, what disruption is involved, and whether the work can be coordinated with planned sod or planting. Keep useful existing components where appropriate rather than assuming every assessment requires a full replacement.
Prepare for the visit
Provide controller access, zone information if available, photos of intermittent problems, and notes about recent landscape work. Clear access to visible valve boxes and point out private lines, lighting cables, and other known obstacles. Explain whether the system uses a special water source or has operating restrictions you already know about.
You do not need to diagnose the system yourself. The goal is to make the problem observable and the property accessible.
Common questions
Does brown grass always mean an irrigation problem?
No. Irrigation is one item to check. Grass condition may also involve sunlight, traffic, pests, disease, or other site factors.
Can I use the same watering schedule year-round?
Do not assume one setting fits every season or planting stage. Review changing conditions and current local rules rather than relying on a generic number of minutes.
Should repairs happen before new sod?
Coverage and obvious faults should be addressed before installation, with another check as the lawn is handed over. New sod needs an establishment plan appropriate to the property.
Plan the next step with RLC
RLC Lawn & Landscape is based in Lutz and serves Tampa-area homeowners. Tell us what is difficult about your yard, what you want to keep, and what you would like to change. We can discuss the landscape work that fits your property and priorities.
Request a free landscape estimate or call (813) 767-4022.
Related planning guides
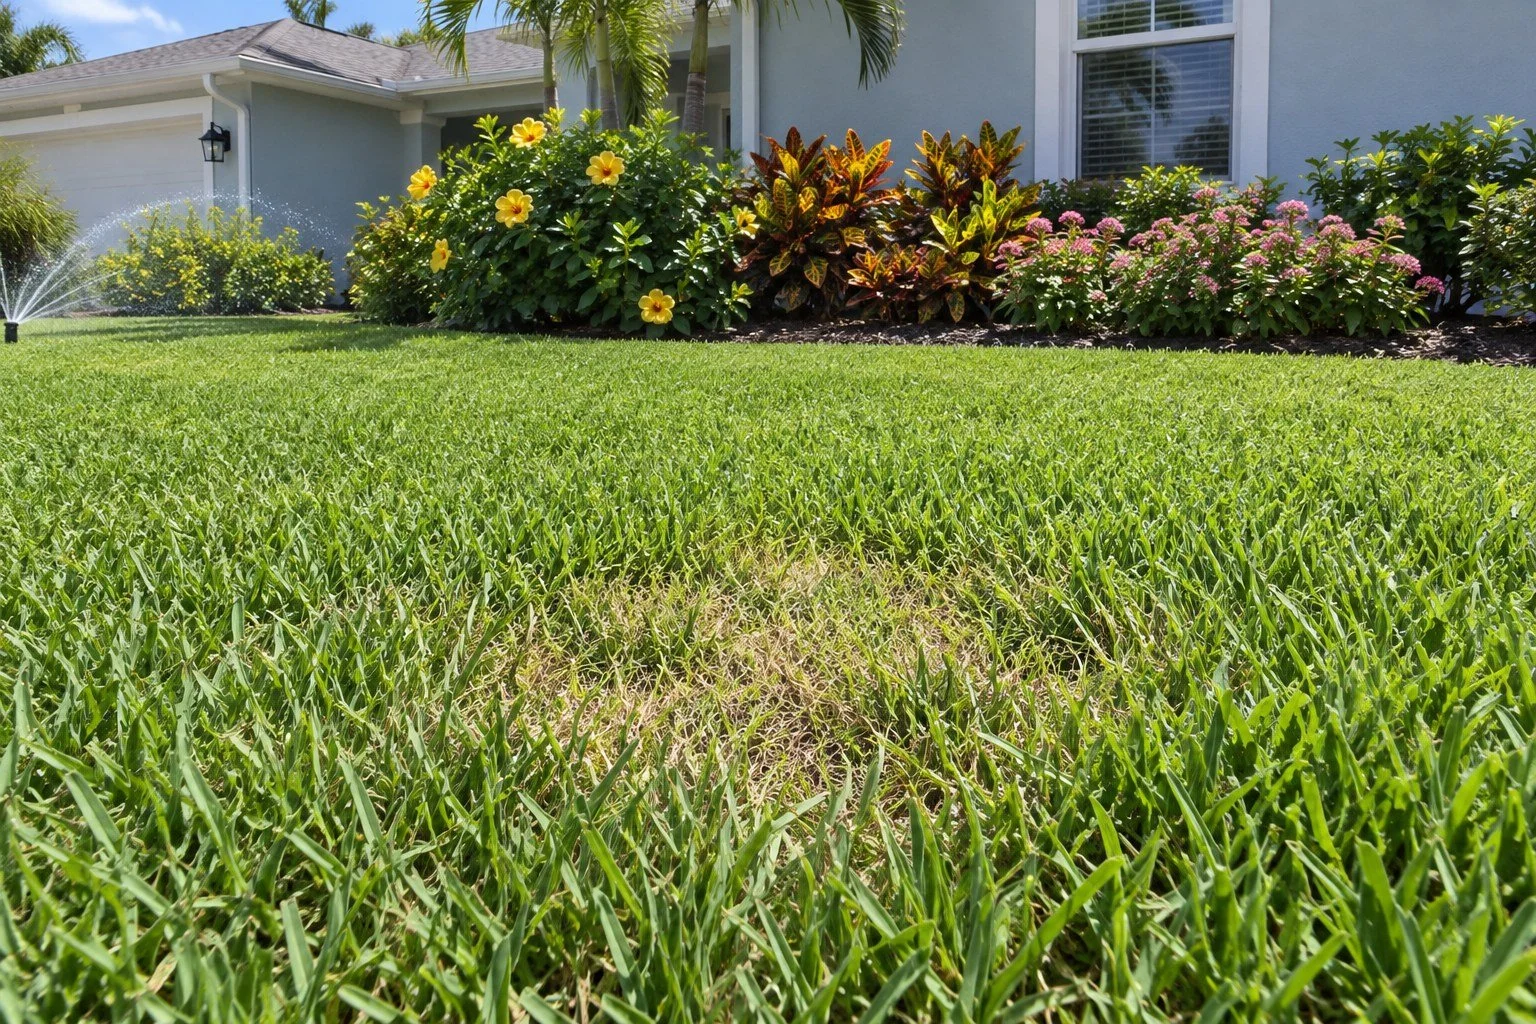
Why Is My St. Augustine Lawn Turning Brown in Tampa?
Brown grass does not always mean dead sod. Learn what to observe, when irrigation may be involved, and what to check before replacing a Tampa lawn.
Brown areas in a St. Augustine lawn can have several causes, and appearance alone is not enough to choose a treatment. Start by checking where the damage occurs, how quickly it changed, the available sunlight, and whether irrigation coverage is even. Identify the underlying issue before installing replacement sod.
The expensive mistake is repeatedly replacing a patch without correcting the conditions that damaged it. A lawn may need a change in care, an irrigation repair, a professional diagnosis, or a different landscape use for that area. This guide helps Tampa-area homeowners gather the information needed to make that decision.
Record the pattern before changing anything
Take one wide photo showing the lawn and surrounding plants, then closer photos at the boundary between healthy and affected grass. Note when you first noticed the problem and whether it is spreading. Record recent mowing changes, construction, heavy foot traffic, fertilizer or pesticide applications, and irrigation adjustments.
Look for location clues. Is the area beside pavement, under a dense tree, at the far end of a sprinkler zone, or along a route used by people or pets? Those observations are useful, but none is a diagnosis by itself. Preserve the history rather than changing several things at once and losing track of what helped.
Check irrigation coverage, not just the timer
A sprinkler system can turn on while parts of the lawn receive poor coverage. Observe the affected zone during a permitted test and look for blocked, damaged, tilted, or nonworking heads. Compare the problem area with nearby healthy turf.
Adding runtime may overwater areas already receiving enough water while doing little for a missed corner. If coverage appears uneven, ask for a system assessment before ordering sod. A repair should address the cause of the uneven application rather than simply make the controller run longer.
Consider whether the site still suits grass
Trees and shrubs grow, changing the light that reaches a lawn. A space that once supported turf may now be much shadier. Repeated traffic, soil disturbance, and changes in how the yard is used can also affect the outcome.
For persistent shade-related trouble, compare a suitable planting bed or another planned surface with replacing grass again. Do not assume every St. Augustine variety will perform equally in the same conditions. Our guide to St. Augustine grass in shade explains the planning questions to ask.
Do not assume every brown patch is a disease
UF/IFAS explains that lawn disease, pest damage, and maintenance problems can be difficult to distinguish. Its lawn problems and solutions resources are a useful starting point. A sample or site assessment may be needed when the cause is unclear.
For example, large patch is a specific turf disease, not a general name for every brown area. Avoid buying a treatment solely because the package shows a similar-looking lawn. Treatment choices should follow a confirmed problem and applicable product directions.
When can the lawn recover, and when might sod help?
The answer depends on whether viable turf remains, what caused the damage, and whether conditions have been corrected. Ask the person assessing the lawn to distinguish between the diagnosis, the corrective work, and the cosmetic restoration.
Replacement sod may make sense for areas that need reestablishment after the cause has been addressed. It is not a substitute for fixing a leak, correcting poor coverage, or reconsidering an unsuitable site. If only part of the lawn is affected, discuss whether selective replacement is practical and what differences may be visible while it establishes.
What should a lawn restoration proposal include?
The area measured and proposed for replacement.
The findings that support replacement rather than another approach.
Existing grass and debris removal, where needed.
Preparation and finish-grade expectations.
The selected grass variety and why it suits the property.
Irrigation checks and any separately priced repairs.
Delivery, installation, and the establishment-care handoff.
Clarify who will monitor the new lawn and how concerns should be reported. A homeowner who travels frequently may need a different handoff plan from someone who can check the lawn each day.
What you can do before calling
Gather photos, controller settings, the approximate age of the lawn, and the history of previous repairs. Mark the affected area on a simple sketch. If a lawn treatment provider is already involved, share their findings so separate contractors are not working from conflicting assumptions.
Avoid aggressive renovation or unplanned chemical applications while the cause is uncertain. Useful observations often save more time than trying several unrelated remedies.
Common questions
Should I fertilize brown grass to make it green?
Do not treat fertilizer as a universal fix. Determine what is limiting the lawn first and get guidance appropriate to the problem.
Can RLC help if the problem is more than sod?
Discuss the visible issue when requesting an estimate. RLC can review the landscape and installation scope; specialist pest, disease, or laboratory diagnosis may be appropriate where the cause requires it.
Does a healthy lawn photo show what mine will become?
No. The illustration shows a landscape concept. Actual results depend on your site, the cause of damage, the work performed, and ongoing care.
Plan the next step with RLC
RLC Lawn & Landscape is based in Lutz and serves Tampa-area homeowners. Tell us what is difficult about your yard, what you want to keep, and what you would like to change. We can discuss the landscape work that fits your property and priorities.
Request a free landscape estimate or call (813) 767-4022.
Related planning guides
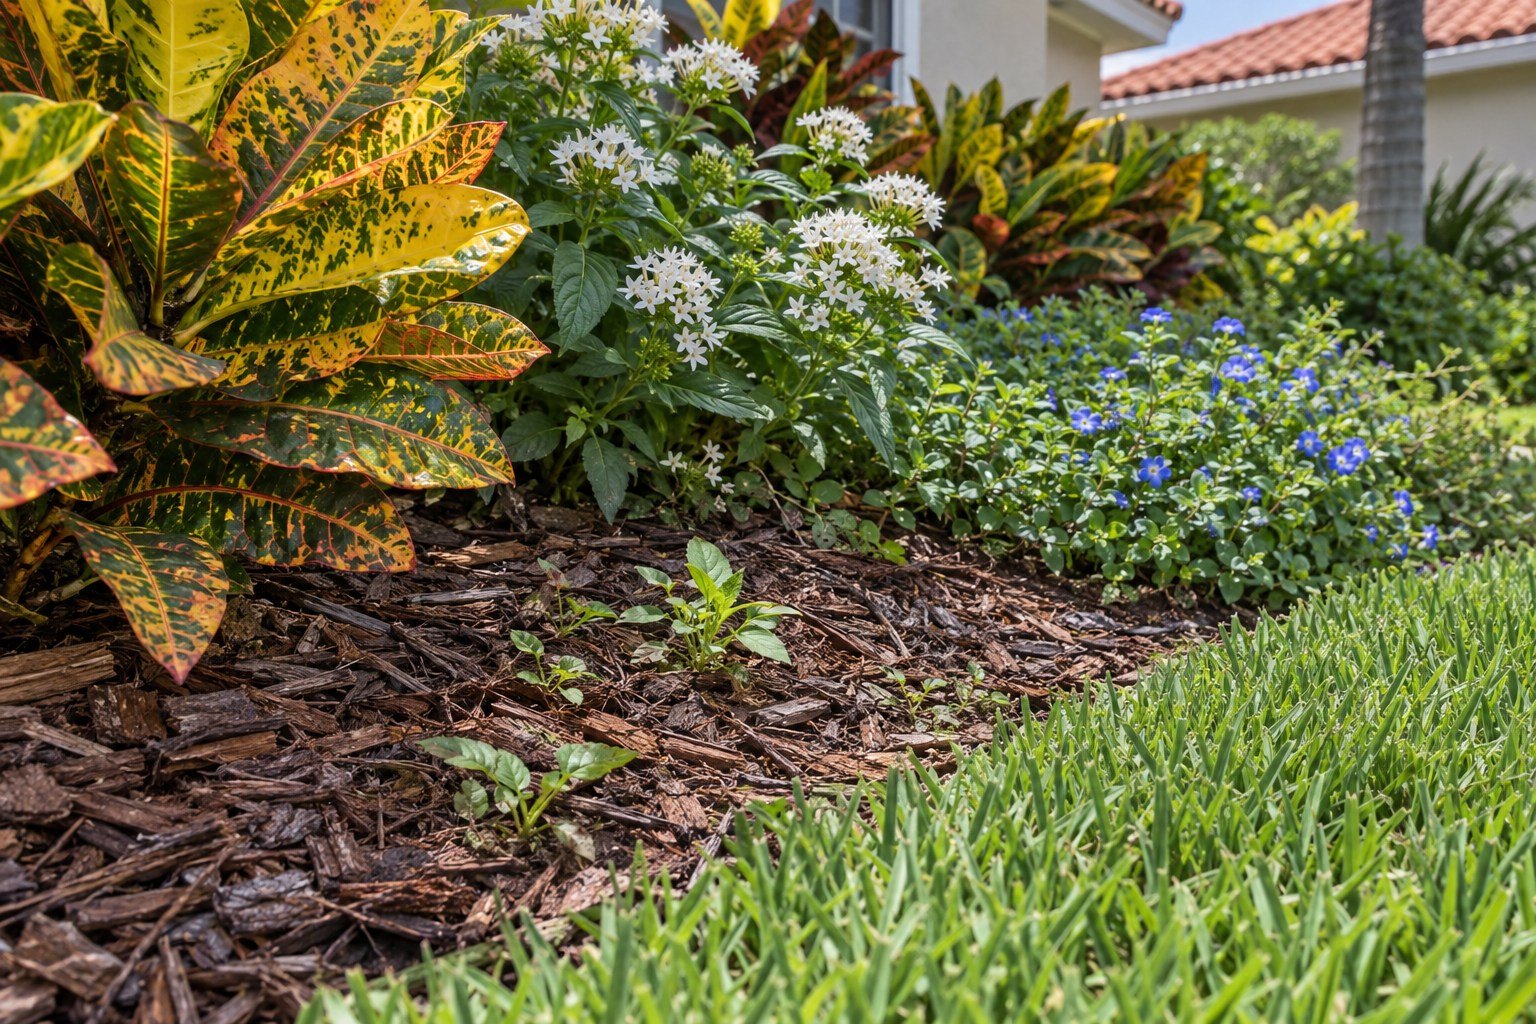
Why Do Weeds Keep Coming Back in Landscape Beds?
Find out why weeds return in mulch and rock beds, what preparation matters, and when a landscape bed renovation is more useful than another quick cleanup.
Weeds return because removing visible growth does not always remove the source of the problem. Seeds can arrive from surrounding areas, established weeds can regrow, and thin or disturbed ground cover leaves opportunities for new growth. A lasting improvement combines identification, appropriate removal, a workable bed layout, and regular follow-up.
For Tampa homeowners, this can become a frustrating cycle: spend a hot Saturday pulling weeds, add fresh mulch, and see green shoots again. Before repeating the same work, look at where the weeds are coming from and whether the bed itself needs attention.
Look for the pattern before choosing a solution
Are weeds appearing mainly at the lawn edge, between plants, through old fabric, or on top of decorative stone? Does the same growth return in the same spot? Photograph the leaves and the overall area before clearing it. Different weeds may require different approaches, and a single generic treatment is unlikely to answer every situation.
A clean-looking surface can hide a complicated problem below. Old roots, buried edging, and previous layers of material may affect the work. Avoid paying for a cosmetic refresh when the underlying issue needs to be addressed first.
Why a thicker layer is not always the answer
Mulch is useful for suppressing weeds, but it should not be piled indefinitely. Check the material already present and keep it away from plant bases. UF/IFAS describes mulch as one part of weed management rather than a permanent barrier; its weeding guide also explains why the amount and type of weeds affect the best approach.
Ask an installer to assess the existing depth rather than automatically adding the same amount everywhere. Areas beside edging, walks, and plant crowns may already have more buildup than the open parts of the bed.
Does landscape fabric stop weeds forever?
No. UF/IFAS notes that weeds can grow through or on top of fabric, and that removal can become more difficult when roots penetrate it. See Improving Weed Control in Landscape Planting Beds. Fabric choices should be discussed for the specific application, not sold as a lifetime weed-free guarantee.
In an established ornamental bed, removing old fabric may require careful work around retained plants. In a decorative stone installation, a separator can serve a different purpose from stopping all future weeds. Ask what material is being proposed, why it is appropriate, and how future planting changes would be handled.
Check the lawn-to-bed boundary
A poorly defined edge makes it difficult to maintain the transition. If turf keeps entering the bed, simply covering the encroaching growth does not create a durable boundary. The edge detail should fit the layout, equipment, and ground cover.
Consider maintenance access as well. A border that looks attractive but prevents practical trimming or catches debris may create another chore. Stone should be contained so it does not migrate into mowing areas, and the surrounding finish grades should make sense.
When does a bed need more than weeding?
Unwanted growth is tangled throughout shrubs or old root systems.
There are several layers of mulch, fabric, or mixed stone.
The bed is too crowded to reach safely and comfortably.
Plants are failing or repeatedly being replaced.
The bed outline creates narrow, unmaintainable lawn strips.
Previous cleanups improve the appearance only briefly.
These conditions may justify a bed renovation: selectively removing unsuitable plants, preparing the area, recovering a clear outline, and reinstalling appropriate planting and ground cover. The proposal should explain what is being corrected and what follow-up remains necessary.
What to ask for in a professional scope
Describe the result you want rather than asking only for “weed removal.” A useful scope identifies the areas included, plants to protect, removal method, hauling, existing material treatment, edging, and final ground cover. Ask how regrowth will be monitored and whether later visits are included or separate.
If chemical control is proposed, ask who will perform it and whether it is appropriate for the identified weeds and surrounding plants. Follow the product label and applicable requirements; this guide is not a prescription for a particular chemical or application rate.
Where DIY makes sense
A few accessible weeds may be reasonable to manage yourself. A whole property of tangled beds, heavy stone, or persistent regrowth is a different workload. Consider the time spent bending, hauling, cleaning tools, and returning to the same areas. Professional help is particularly useful when the work also includes redesign, plant removal, or material replacement.
Whatever route you choose, plan short, regular inspections afterward. A bed that is easy to walk around and inspect is easier to keep under control than one you avoid because every visit is a major project.
Common questions
Will replacing mulch with rock end the problem?
No. Stone is a design and maintenance choice, not a guarantee against weeds. Leaves and other material can collect in it, and future cleanup should be part of the decision.
Should I remove every plant and start over?
Not automatically. Healthy, appropriately sized plants may be worth retaining. The goal is to address the cause of repeated work without replacing useful landscaping unnecessarily.
Plan the next step with RLC
RLC Lawn & Landscape is based in Lutz and serves Tampa-area homeowners. Tell us what is difficult about your yard, what you want to keep, and what you would like to change. We can discuss the landscape work that fits your property and priorities.
Request a free landscape estimate or call (813) 767-4022.
Related planning guides
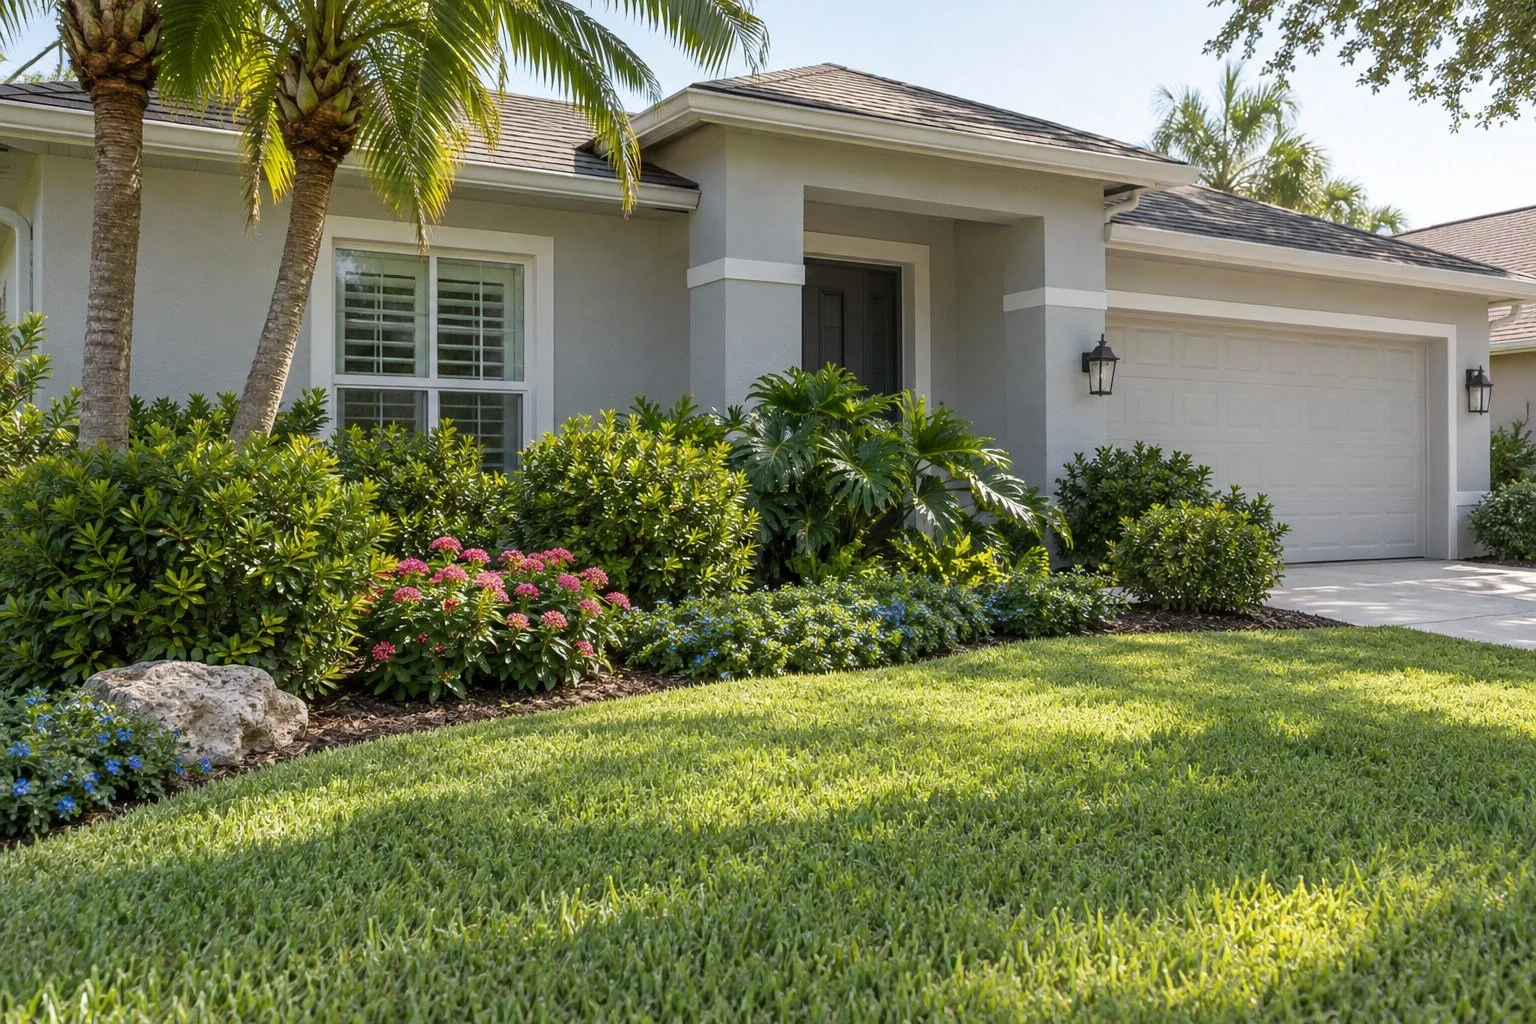
How Can You Make a Tampa Landscape Lower Maintenance?
Reduce trimming, weeding and lawn frustration with a practical Tampa landscape plan. Learn what to change, what to keep, and how to compare options.
A lower-maintenance Tampa landscape starts with plants that fit the space, clear bed edges, sensible lawn areas, and an irrigation plan that matches the planting. Replacing everything with rock or artificial turf does not automatically eliminate work. The most useful redesign removes the repeated chores that make your particular yard difficult.
If every weekend disappears into trimming, pulling weeds, and dealing with the same failing patch of grass, the issue may be the layout rather than your effort. A thoughtful change can reduce those recurring tasks while keeping the yard green, attractive, and appropriate for a Florida home.
Identify the work you actually want to reduce
Write down what you did in the yard over the last month. Separate mowing, hedge trimming, hand weeding, leaf cleanup, watering, and replacing plants. Then identify the two jobs you dislike most. A plan for less trimming looks different from a plan for a shaded lawn or a narrow side yard that is difficult to mow.
Be specific about how much upkeep you are willing to do or hire out. “Low maintenance” should mean a realistic maintenance routine, not a promise that living plants will stop growing.
Choose plants for their mature size
A small nursery plant can become a large shrub. If a planting strip is too narrow for the mature plant, regular shearing becomes part of the design whether you wanted it or not. Before selecting replacements, compare the available width and height with the plant’s expected growth habit.
For example, a privacy hedge has a different job from a low planting below a window. A large hedge species should not be forced into a narrow decorative border simply because it is easy to find. Keep required access to windows, equipment, gates, and paths in the plan.
UF/IFAS recommends matching plants to site conditions and choosing suitable plants that need fewer inputs once established. Its Florida-Friendly Landscaping principles provide a useful starting point. Site suitability still matters more than a generic “easy plant” label.
Make beds simpler to maintain
Continuous beds with clear outlines are often easier to understand and work around than many small disconnected planting pockets. Look for tight corners where a mower cannot turn, narrow grass strips trapped between plants, and decorative stones that repeatedly migrate into the lawn.
Leave practical access for weeding and pruning. An attractive bed is not successful if its middle can only be reached by stepping on other plants. Group planting deliberately, allowing enough room for growth without leaving the final layout dependent on constant cutting.
Keep lawn where it has a useful role
An open lawn can provide space for children, pets, and everyday use. The goal is not necessarily to remove it. Focus instead on difficult fragments: deep shade, awkward corners, heavily traveled shortcuts, and strips that are inconvenient to irrigate or mow.
Some areas may work better as planting beds or another appropriately designed surface. Artificial turf can be worth comparing for certain uses, but it needs cleaning, drainage planning, edge care, and attention to surface heat. Decorative rock also collects leaves and does not prevent all weeds.
Compare mulch and stone by the maintenance they create
Mulch needs periodic replenishment. Stone is heavier to install and remove, and debris can collect between pieces. Where trees shed leaves, consider how you will clean the area without constantly moving the ground cover. Decide on the boundary detail before ordering either material.
Do not bury existing layers under more material just to make the surface look new. Ask whether buildup, weeds, old fabric, or grade problems need attention first. The right preparation can matter more to the result than the color of the material.
Fix watering mismatches during the redesign
A landscape conversion may leave old sprinklers aimed at new beds or missing retained lawn. Have coverage reviewed when bed shapes or plant locations change. Separate the installation plan from the establishment plan: newly planted material still needs appropriate care even if the mature landscape is intended to need less attention.
A controller setting alone cannot compensate for a blocked head or an unsuitable layout. Include irrigation review in the scope rather than discovering the mismatch after new plants arrive.
A practical way to phase the project
Choose the most time-consuming or repeatedly failing area.
Identify healthy plants and functional lawn worth keeping.
Draw the proposed bed and lawn boundaries.
Confirm plant sizes, access, and irrigation changes.
Complete preparation and installation in a coordinated sequence.
Agree on the ongoing tasks and who will handle them.
This approach can improve a specific area without requiring every part of the property to change at once. Keep a simple overall plan so one phase does not obstruct the next.
Questions to ask before hiring
Which recurring tasks will this design reduce?
How large will the proposed plants become?
What care is needed during establishment?
How will bed edges, leaf cleanup, and irrigation be handled?
What maintenance will still be necessary?
Is a tropical landscape always high maintenance?
No single style determines the workload. Plant selection, mature size, placement, and the amount of formal trimming are more useful considerations than the word “tropical.”
Can a lower-maintenance yard still have color?
Yes. Color can come from selected foliage accents rather than filling every bed with seasonal replacements. The number and placement of accents should fit the conditions and the routine you want.
Plan the next step with RLC
RLC Lawn & Landscape is based in Lutz and serves Tampa-area homeowners. Tell us what is difficult about your yard, what you want to keep, and what you would like to change. We can discuss the landscape work that fits your property and priorities.
Request a free landscape estimate or call (813) 767-4022.
Related planning guides
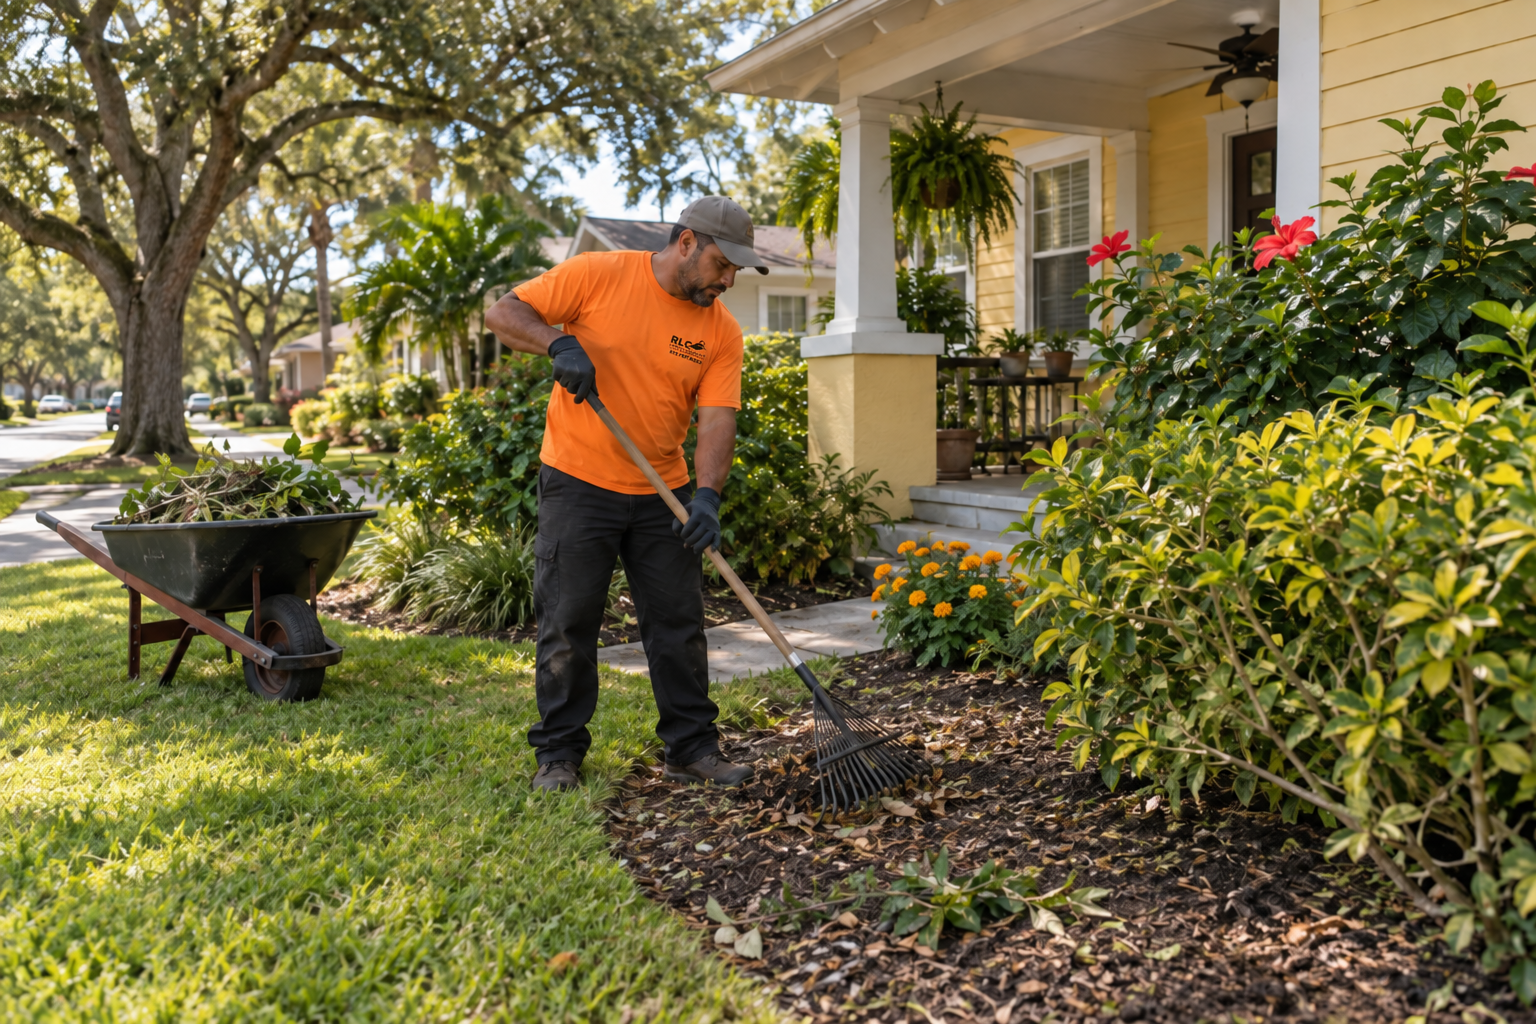
How Do You Clean Up an Overgrown Yard in Tampa?
Learn how to plan an overgrown yard cleanup in Tampa, what affects the work, what to keep, and when professional landscape help makes sense.
Start an overgrown yard cleanup by deciding what stays, identifying hidden obstacles, and dividing the property into manageable areas. Clear unwanted growth and debris before spending money on new plants or mulch. If the work involves dense shrubs, heavy hauling, uncertain plant identification, or several weekends in Florida heat, a coordinated professional cleanup may be the more practical choice.
An overgrown yard does not automatically need a complete replacement. A good cleanup separates recoverable landscaping from plants and layouts that keep causing problems. For a Lutz or Tampa homeowner, the goal should be a yard that looks better now and is easier to maintain afterward.
Walk the property before cutting anything
Start from the street, then look from the front door, patio, and main windows. Make three lists: plants you want to keep, plants you are unsure about, and things that clearly need attention. Photograph each area. Mark sprinkler heads, low-voltage lights, valve boxes, utility equipment, and drains that growth may have covered.
Note narrow gates, soft ground, pool screens, pets, and places where equipment or debris would have to pass. A small backyard with difficult access can require more handling than a larger open front yard. Do not assume every green plant is desirable or every bare-looking shrub is dead. Plant identification comes before aggressive removal.
Separate a cleanup from a renovation
A cleanup restores order: removing loose debris, addressing unwanted growth, selectively pruning suitable plants, and recovering bed edges. A renovation changes the structure of the landscape: replacing oversized plants, reshaping beds, modifying irrigation, or installing new lawn and planting.
Ask whether the current layout could work with routine care. If shrubs repeatedly cover windows or a hedge occupies a walkway, simply trimming everything smaller may leave you with the same problem again. Conversely, replacing healthy plants just because they look untidy can add expense without improving the design.
A sensible sequence for the work
Confirm the scope. Identify retained plants, removal areas, disposal expectations, and access restrictions.
Expose the working area. Remove loose debris and carefully open access to beds and equipment.
Address unwanted vegetation. The removal method depends on the plant, roots, nearby structures, and whether it can regrow.
Prune retained plants appropriately. Avoid treating every species as a hedge or cutting all shrubs to the same height.
Reestablish bed boundaries. Review where lawn, mulch, and any decorative stone should meet.
Check irrigation and lighting. Growth may have hidden damaged, buried, or poorly positioned components.
Finish and plan follow-up. Install appropriate ground cover, remove agreed debris, and decide how new growth will be managed.
UF/IFAS notes that severe renovation pruning is not suitable for every shrub. Recovery and appearance depend on species and the approach taken. See its guide to pruning shrubs and hedges before assuming everything can be cut back hard.
Why the job can be larger than it looks
Cutting vegetation is only part of the labor. The material must be gathered, carried through the property, loaded, and removed. Old edging, embedded fabric, vines tangled through shrubs, and mixed stone and soil can slow that work. The final detail work also matters: a cleared bed with an uneven outline can still look unfinished.
Florida heat changes what a homeowner can comfortably complete in a day. Count the whole job, including equipment pickup, loading, disposal, and cleanup. If you can only work for short periods, the project may remain half-finished while new growth returns. Hiring help can be about getting the sequence completed, not just avoiding a rake.
What should a cleanup estimate specify?
The exact front, side, and rear areas included.
Which plants are retained, pruned, or removed.
Whether root removal or only above-ground cutting is included.
How debris will be handled and whether hauling is included.
Whether mulch, edging, replacement planting, or irrigation work is separate.
How unexpected buried material or inaccessible areas will be handled.
A useful comparison is between matching scopes. A price for cutting brush and leaving a pile is different from a price for removal, hauling, bed restoration, and finishing.
Common homeowner questions
Can I do the easy parts first?
Yes. Picking up small loose items and identifying plants you want to keep can help. Agree on the division of work before starting so you do not remove something the final design needs or pile debris where equipment must go.
Will one cleanup keep weeds away permanently?
No. A cleanup resets the property; continued growth still needs attention. Include an achievable follow-up plan rather than assuming a fresh layer of mulch ends maintenance.
When should I get specialist help?
Large-tree work, overhead hazards, uncertain utilities, and structural drainage problems need the appropriate specialist. Ask a landscape contractor to identify work outside the proposed cleanup scope before it begins.
Plan the next step with RLC
RLC Lawn & Landscape is based in Lutz and serves Tampa-area homeowners. Tell us what is difficult about your yard, what you want to keep, and what you would like to change. We can discuss the landscape work that fits your property and priorities.
Request a free landscape estimate or call (813) 767-4022.
Related planning guides
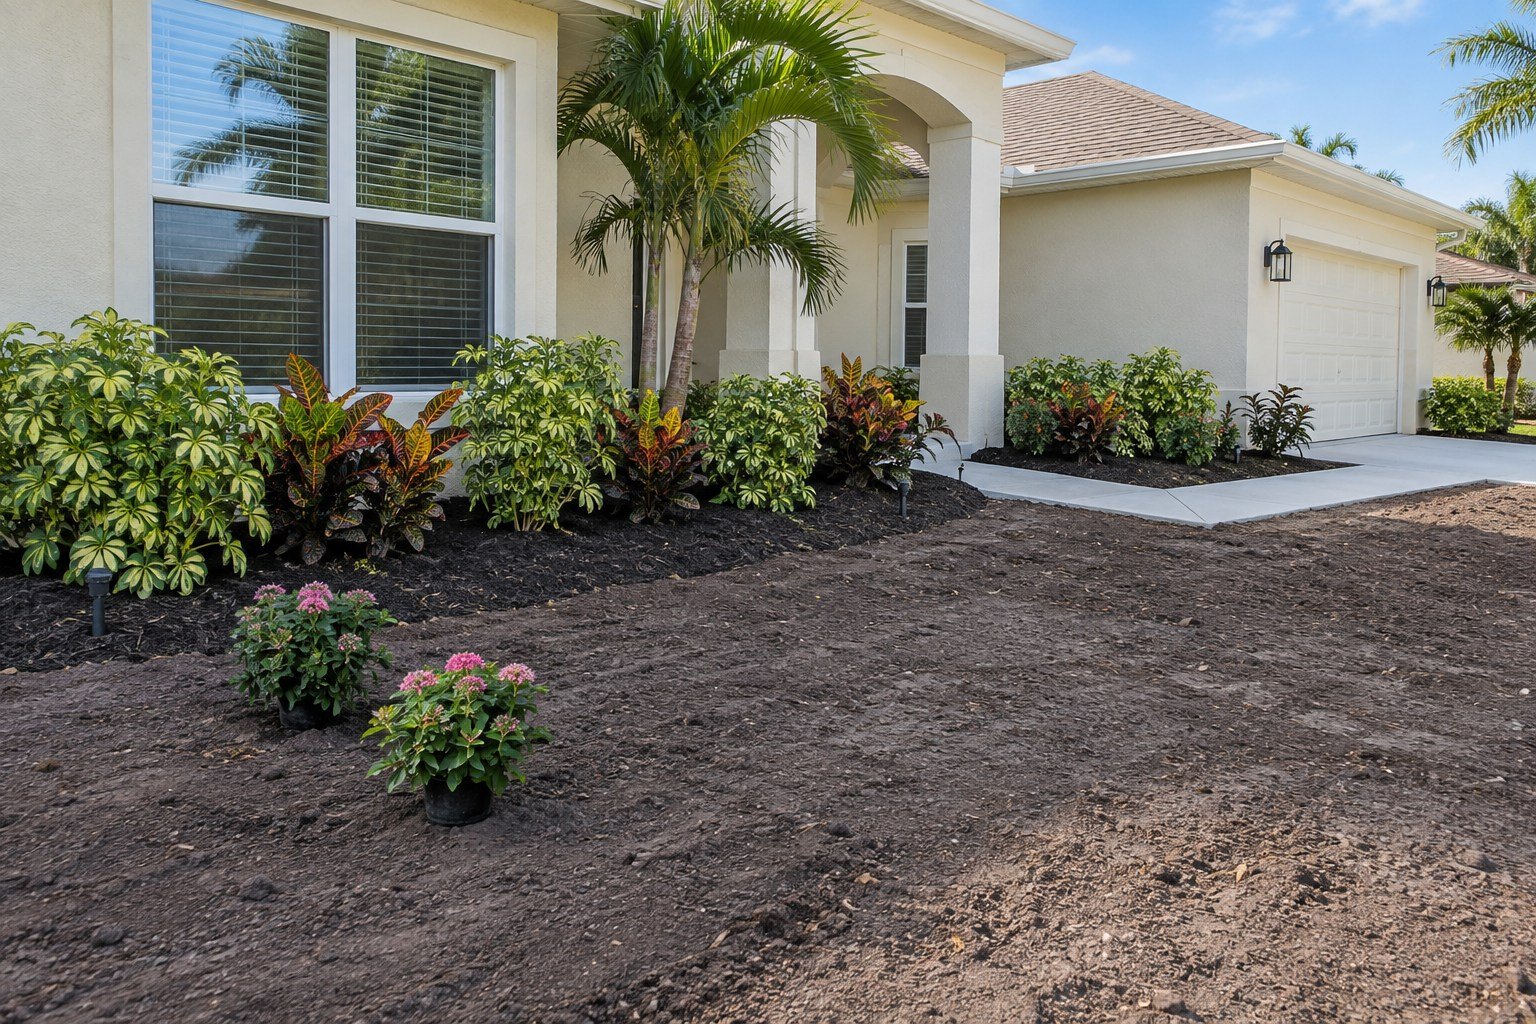
What Comes First in a Landscape Renovation?
Plan removal, bed layout, irrigation, palms, lighting and sod in a sequence that avoids disturbing completed work and ties the yard together.
A landscape renovation should begin with a shared plan for the finished yard. Next, check the property and prepare the ground. Complete work that needs digging or heavy equipment before finishing the planting beds and lawn. The exact order depends on the yard and the work planned.
Starting with whichever item looks easiest can mean doing the same work twice. New sod may be damaged by later deliveries, and finished beds may need to be opened again for irrigation or lighting.
1. Decide what to improve and what to keep
Decide what must improve: privacy, an overgrown entrance, an unusable lawn, nighttime appearance or the connection between separate parts of the yard. Identify the plants and features worth keeping.
Record gates, utility access, roof runoff, irrigation equipment and routes used by cars and people. Keep the garage entrance and driveway clear. Leave access to gates, equipment and utilities.
2. Plan connected planting beds
Lay out planting beds so they relate to the house and existing routes. Avoid small leftover patches of grass and decorative islands that make mowing or access awkward. Leave room for plants to grow near windows, walls and equipment.
A front-yard plan might use taller background planting, selected crotons for a middle layer of color, and liriope along a lower edge where conditions suit each plant. A palm can provide a focal point. This is one example. Each plant still needs the right sunlight and growing conditions.
3. Finish removal, digging and heavy work
Agree on removals, ground preparation and delivery access before the finish work begins. Fix known drainage problems before covering the ground with new material. Plan any large palm or tree installation around the equipment and clearance it needs.
4. Plan sprinklers and lighting together
Adjust the irrigation plan to the new beds and lawn areas. Identify lighting features and wiring routes before planting makes digging more difficult. Some final connections and aiming happen later, but the plan should be settled early.
5. Install and finish the landscape
Coordinate plants, bed surfaces, edging and sod so later work does not unnecessarily disturb completed areas. Make sure the edges meet neatly and lights and equipment remain accessible. Check the result from the driveway, entry and main indoor views, as well as from the street.
6. Know how to care for the finished yard
Review watering while new roots settle in, the selected plants, lawn care and any remaining adjustments. Confirm who is responsible for each item. A good installation needs clear instructions for ongoing care.
If you are completing the project in stages, read how to compare landscape renovation costs. A complete plan can guide smaller stages without treating each one as an unrelated project.
Explore landscape design and installation from RLC Lawn & Landscape, based in Lutz, Florida. Request a free estimate for your Tampa-area yard or call (813) 767-4022.
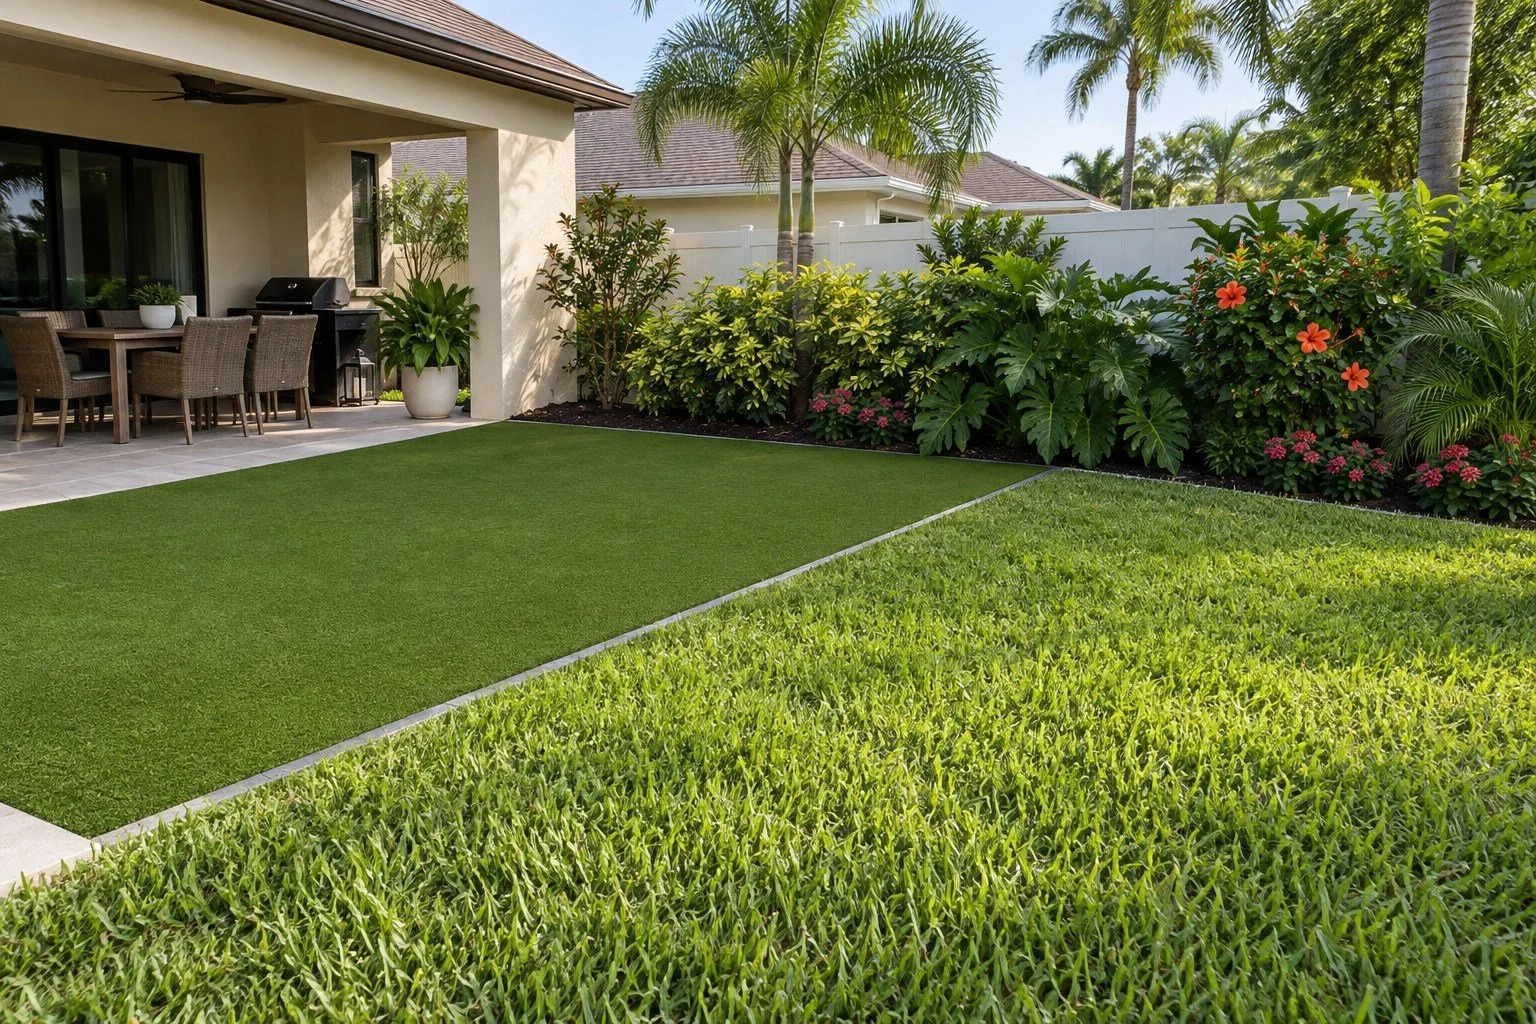
Artificial Turf or Natural Sod: Which Is Better for Your Yard?
Compare natural sod and artificial turf for heat, daily use, upkeep, drainage and installation details before choosing a surface for your yard.
Natural sod and artificial turf solve different problems. Sod creates a living lawn with ongoing growing and maintenance needs. Artificial turf provides a manufactured surface that needs cleaning, can get hot and will eventually need replacing.
The better choice depends on the specific area. A front lawn, narrow side yard and frequently used pet space do not necessarily need the same solution.
Start with how you use the yard
Write down who uses the area and when: children in the afternoon, pets throughout the day, occasional visitors or mainly something you see from inside. Note the sun exposure, shade, access and any standing water.
For a shaded area where grass has repeatedly failed, first determine whether the issue is lack of light, traffic or drainage. Artificial turf should not be treated as a way to avoid checking those problems.
Think about heat and the growing environment
UF/IFAS explains that synthetic turf can become much hotter than living grass and does not provide the same living-soil and habitat benefits. It may still need water for cleaning or cooling. Review its comparison of synthetic turf and Florida-Friendly Landscaping principles.
For a surface used by people or pets, check the area at the times you and your pets will use it. A sample seen in a cool showroom does not answer how the finished area will feel in direct Tampa sun.
Compare the care each surface needs
Natural lawn care includes mowing and attention to watering, fertilizing and keeping the grass healthy. Artificial turf avoids mowing, but leaves, debris and pet waste still require attention. Ask for the manufacturer's recommended care, cleaning products and how to tell when replacement is needed before deciding it is the lower-maintenance option for you.
Questions to ask before installation
What existing material will be removed?
How will the ground and drainage be prepared?
Where will water travel after rainfall or cleaning?
How will edges meet the patio, beds and remaining lawn?
What product or grass variety will be installed?
What preparation, installation and aftercare are included?
For artificial turf, ask about seams, edge attachment and the material and preparation underneath it. For sod, ask about sprinkler coverage and care while the new roots grow. Neither estimate is complete when it only describes the visible green surface.
You can use both in the same yard
You do not need to use one material everywhere. Keep each area's purpose clear and plan clear edges where lawn, turf and planting beds meet. Read our new sod planning checklist.
Explore RLC's sod and artificial turf service. For a Lutz or Tampa-area project, request a free estimate or call RLC Lawn & Landscape at (813) 767-4022.
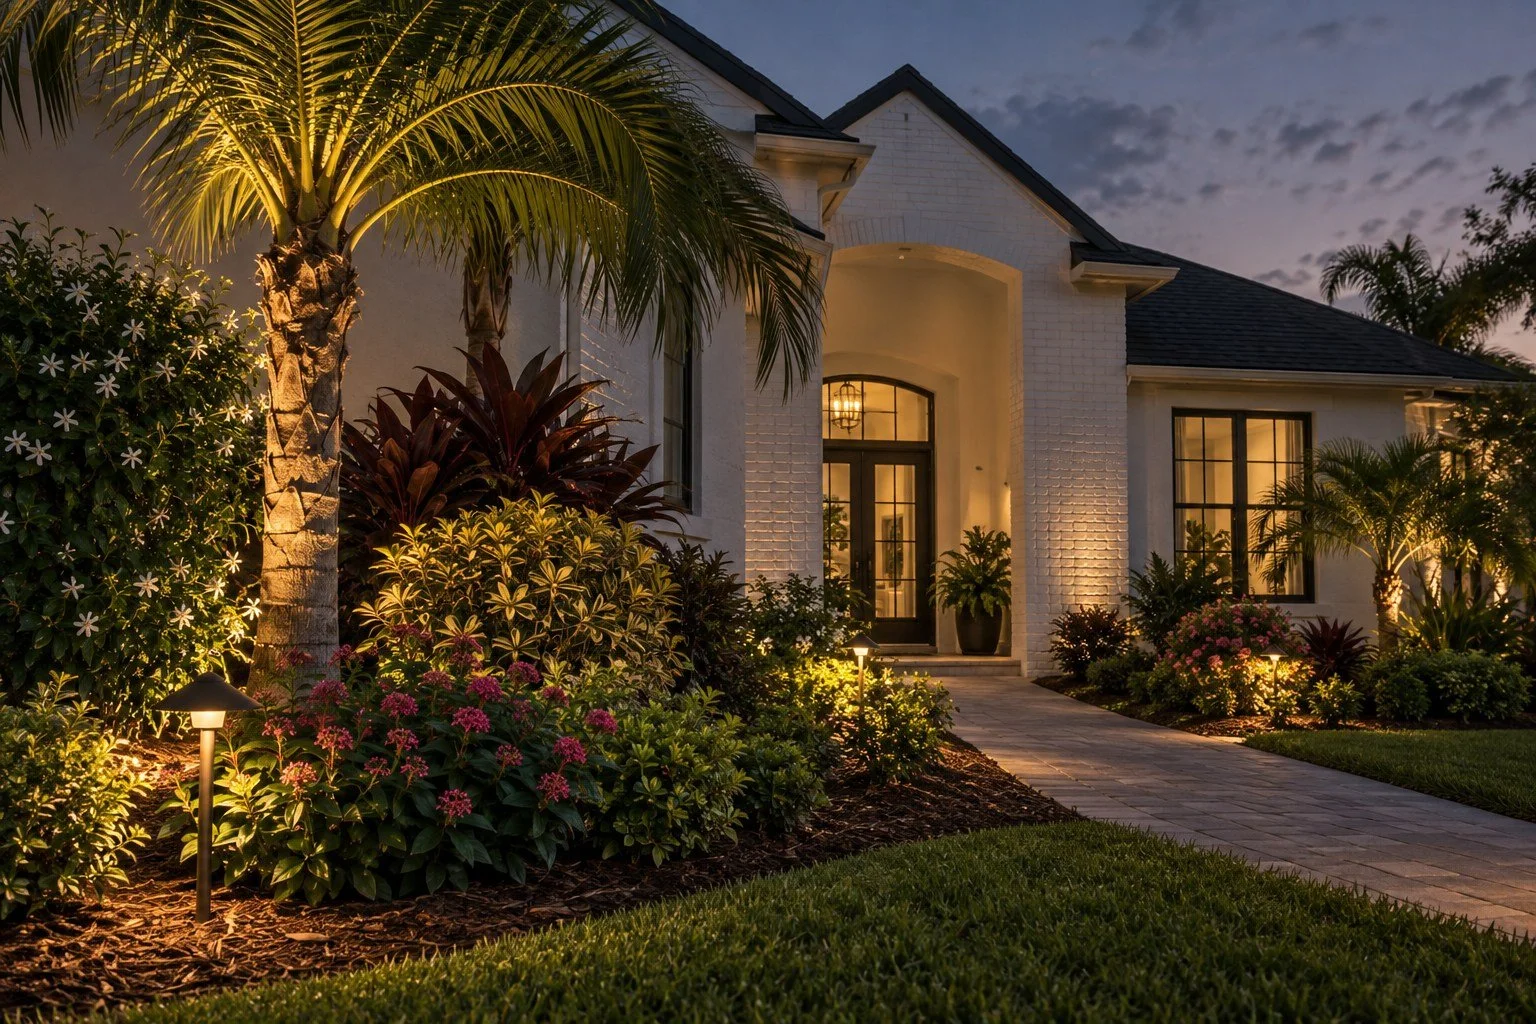
What Should a Landscape Lighting Estimate Include?
Compare outdoor lighting proposals by the areas illuminated, fixture placement, controls, installation scope and nighttime adjustment.
A landscape lighting estimate should describe how the yard will look after dark and what work is included, not just the number of lights. Two systems with the same number of lights can create very different results around a home.
For a Lutz or Tampa property, start with the places you want to use or appreciate after dark: the entrance, a route through the yard, palms, a privacy backdrop or a patio view.
Decide what you want to see after dark
Walk the property after sunset and note what disappears into darkness. Separate practical needs, such as seeing an entrance route, from decorative goals, such as highlighting a palm or textured wall. Avoid asking for every plant to receive its own light; carefully highlighting a few features often creates a cleaner look.
Also consider the view from inside. A fixture that looks well placed from the street may create an uncomfortable bright spot when seen through a bedroom or living-room window.
What should the estimate include?
Lighting locations: which plants, walls and paths will be lit?
Fixtures: what kind of lights will be used and how many?
Power and controls: what power unit, timer or controls are included, and is there a suitable electrical connection?
Installation: how will wiring routes and any necessary access across finished areas be handled?
Finishing: does the price include aiming, adjustment, cleanup and restoring disturbed landscaping?
Aftercare: what maintenance, service terms and manufacturer warranty apply?
Do not assume a warranty or future service visit is included from a general statement such as “complete installation.” Ask for those details in writing.
Keep fixtures out of walking and mowing routes
Fixture positions need to work with the finished landscape. Plan them in suitable spots within planting beds rather than creating obstacles on a sidewalk or along a mower's route. Allow access for adjustment as plants grow, and keep attention on the plant, wall or path being lit rather than an exposed light source.
Why nighttime adjustment matters
The daytime layout is only part of the work. The direction and intensity of the light need to be checked after dark from the routes and windows people actually use. Discuss glare toward neighbors, bright reflections and areas that remain too dark before deciding the installation is complete.
Plan lighting with planting
If new palms, hedges or beds are part of the project, plan the work together. Laying out the wiring before the beds are finished can prevent extra digging later. Read our guide to the order of renovation work.
Explore RLC's landscape lighting service. Request a free estimate from RLC Lawn & Landscape in Lutz, or call (813) 767-4022.
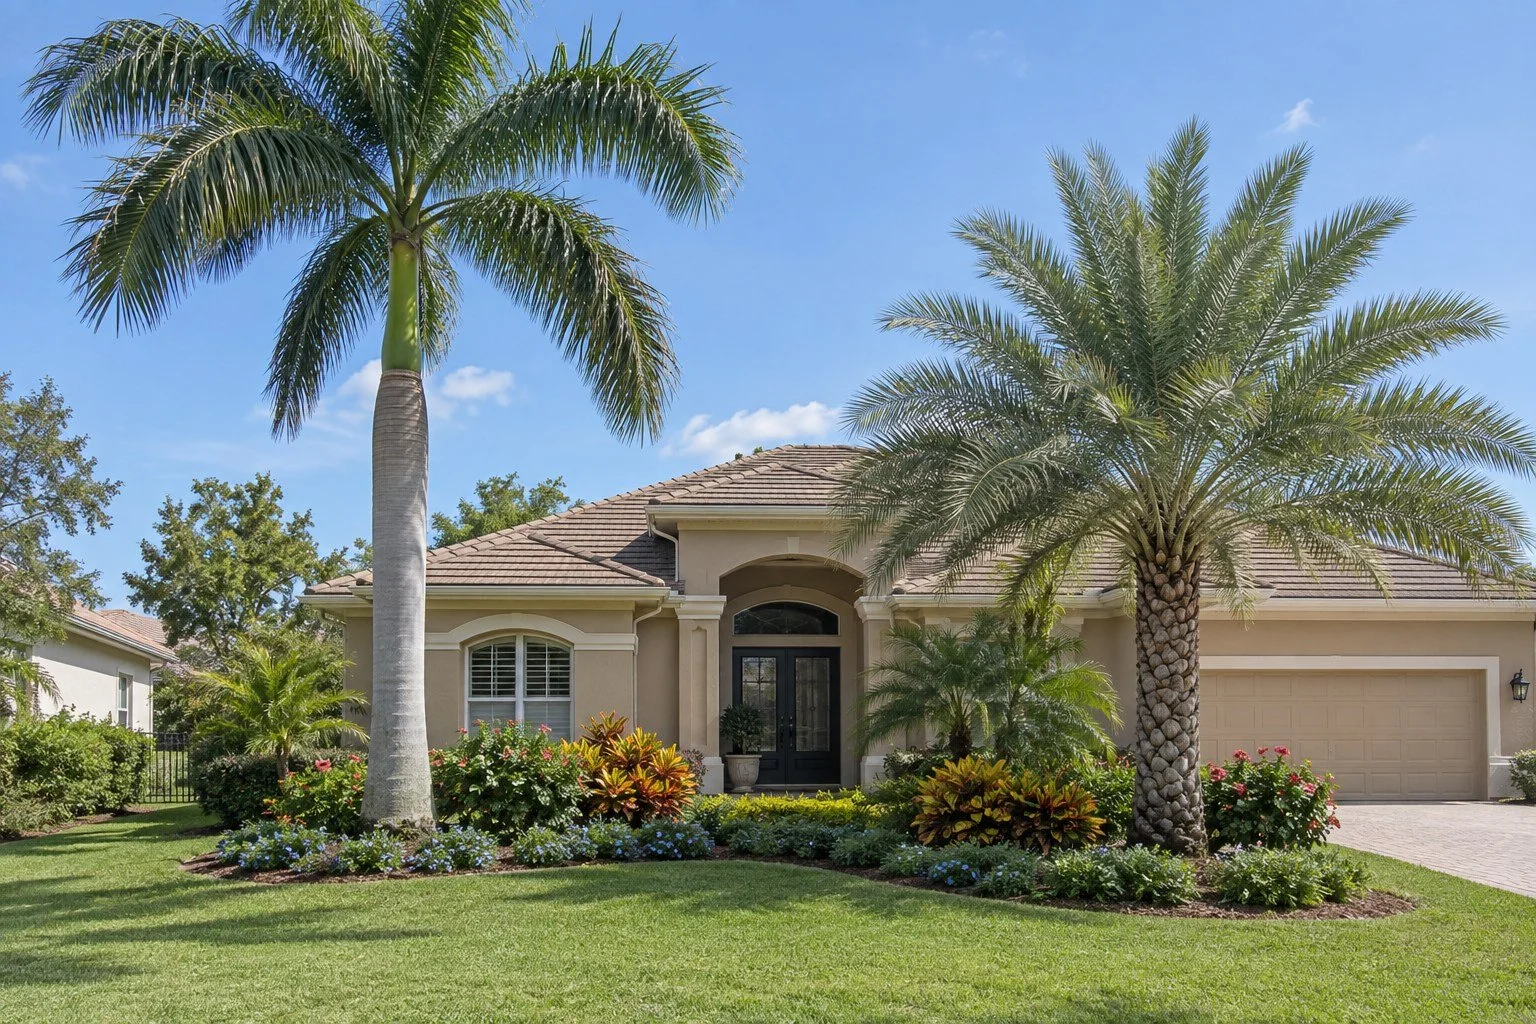
Royal Palm or Sylvester Palm: Which Fits Your Tampa Landscape?
Plan a palm as a long-term landscape feature by checking mature scale, clearances, placement, access and care before installation.
Choose between a royal palm and a Sylvester palm by looking at the available space first. Both can make a strong visual statement, but the right palm must fit the property as it grows—not only look impressive on installation day.
A palm should help organize the landscape. It should not crowd the driveway, obstruct a window or force the surrounding plants into a narrow leftover strip.
When is a royal palm worth considering?
Royal palms have a tall, distinctive presence, but they are very large landscape trees. UF/IFAS describes mature heights of roughly 50–70 feet with a large canopy of leaves and warns that naturally falling fronds can injure people or damage property. It also notes cold sensitivity. Those characteristics make placement and the conditions in your yard especially important. Read the UF/IFAS royal palm profile.
For a residential plan, ask whether the available open space can accommodate a tree that large. Keep the full-grown canopy and falling fronds in mind around parked cars, play areas, walkways and pool enclosures. A dramatic entrance should still function comfortably.
What should you discuss for a Sylvester palm?
Start with the palm variety, installation size and room it will need when fully grown. Ask how the palm will relate to the roofline and nearby planting, and how future care can be performed without damaging surrounding beds.
Palms are not automatically maintenance-free. UF/IFAS's Central Florida palm guide discusses choosing palms, fertilizing them and understanding diseases that can affect Phoenix sylvestris. Consider long-term care as part of the selection, rather than treating appearance as the only difference.
Use a placement checklist
View the proposed location from the street, entrance and main windows.
Leave room for the full-grown canopy and access to maintain the tree.
Identify overhead and underground utilities before installation.
Keep driveway use, gates and walkways clear.
Plan sprinkler coverage and any uplighting before finishing the bed.
Confirm the delivery and installation access required for the selected specimen.
Connect the palm to the whole landscape
A palm can be the main feature in a connected planting bed with taller background planting, a middle layer of color and a lower border. Repeat selected plants to help the yard feel connected rather than filling every gap with a different variety. Choose each supporting plant for the sunlight and space it will have.
See RLC's landscape design and installation service and learn what a landscape lighting estimate should include.
RLC Lawn & Landscape is based in Lutz. Request a free estimate for your Tampa-area landscape or call (813) 767-4022.
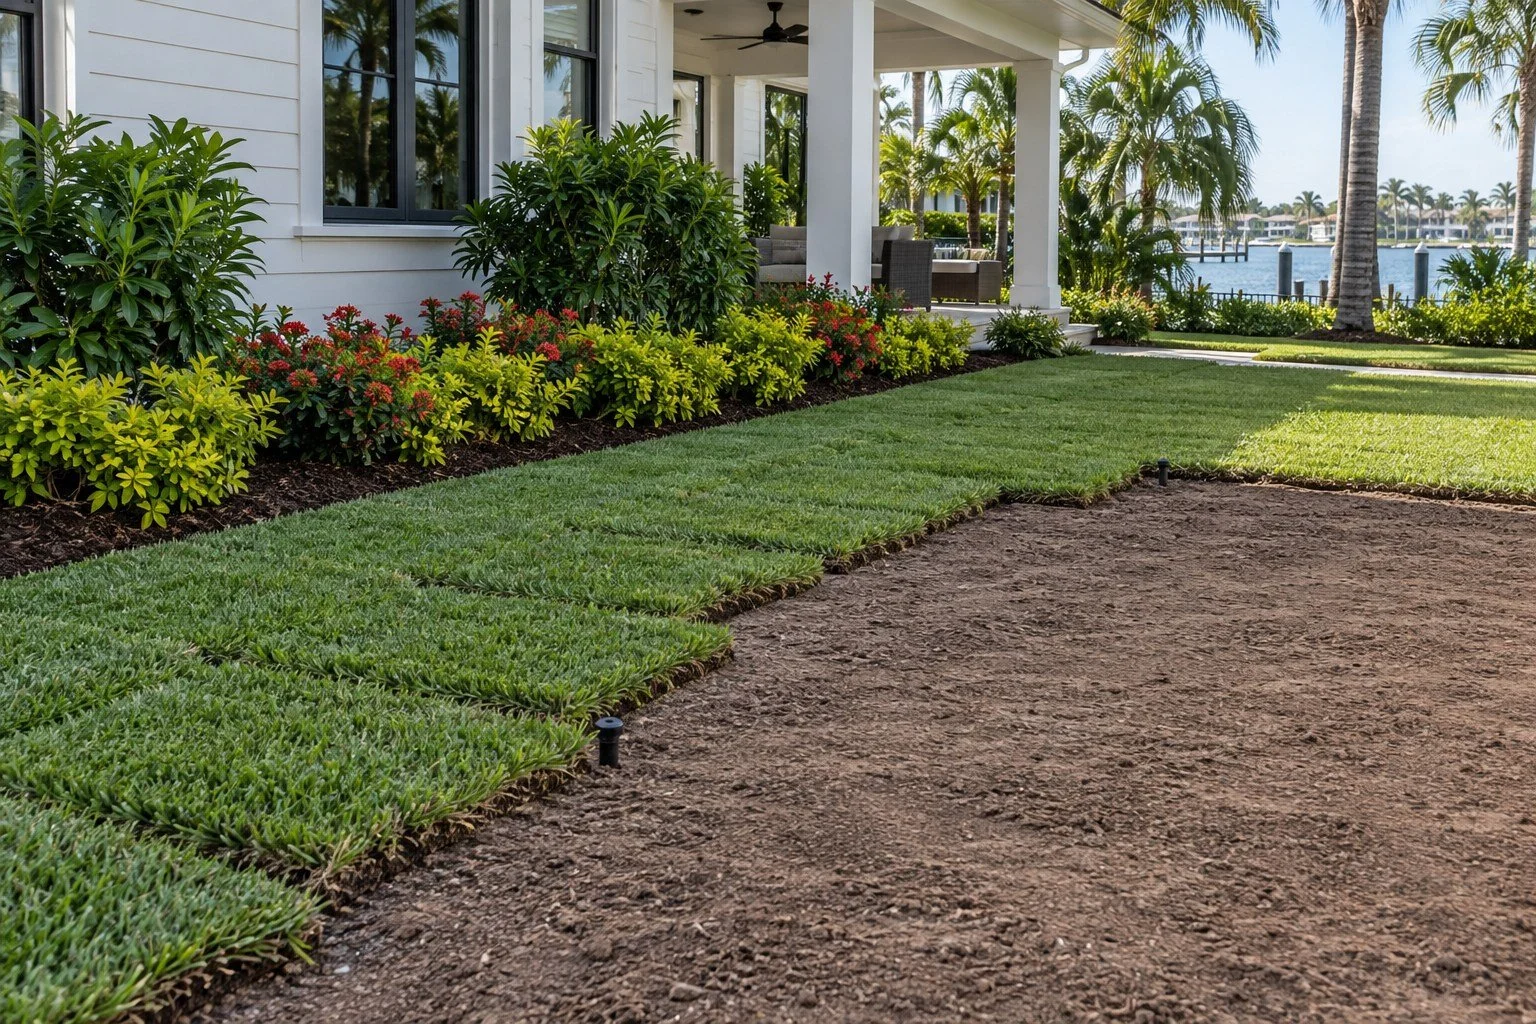
What Should You Check Before Installing New Sod in Tampa?
Check sunlight, sprinkler coverage, ground preparation and the establishment plan before investing in a replacement lawn.
Before installing new sod, identify why the old lawn struggled and make sure the new lawn will have enough sunlight, properly prepared soil and working sprinklers. Sod provides a finished surface quickly; it does not remove the need to solve the problems underneath it.
For a Tampa-area renovation, the best time to plan those details together is before delivery. Once fresh grass is down, correcting missed preparation can disturb the result you just paid for.
1. Choose the grass for the location
St. Augustine is widely used in Florida and is usually installed as sod rather than grown from seed. Its varieties differ in where they grow well and how much care they need. UF/IFAS also notes that repeated traffic can be a limitation. Review its St. Augustinegrass guide and ask for the grass variety by name.
Map the sunny and shaded areas separately. If one strip repeatedly fails under dense shade, discuss changing that area to a bed instead of resodding the entire property to match it.
2. Run the irrigation before work starts
Run each sprinkler zone to check that it works and reaches the whole area. Note areas missed by sprinklers, spray landing on pavement and sprinkler heads that will be in the way of new planting beds. Ask which adjustments are included in the estimate and which are separate.
A working controller alone does not prove that water reaches the whole lawn. Check the actual watering pattern where the sod will go.
3. Plan ground preparation and lawn height
Ask how old grass and weeds, debris and uneven areas will be handled. Check where the new lawn will meet sidewalks, the driveway, beds and drains. The finished lawn should be planned around these features; simply covering an uneven surface does not make it level.
4. Know how to care for the new sod
Agree on who will monitor the lawn after installation, how watering will be adjusted as the roots grow into the soil, and when mowing and regular use can begin. Fresh sod and an established lawn have different needs. Ask for instructions suited to the selected grass and current conditions, not an indefinite “water every day” rule.
Watering restrictions depend on the local area and water source and can change. Check the current requirements with your utility or local government before installation; this article does not prescribe watering days.
5. Finish heavy work before laying sod
Complete work that requires repeated access across the yard before the new lawn where practical. Review our guide to the order of renovation work.
RLC Lawn & Landscape offers sod installation and irrigation services. Request a free estimate for your Lutz or Tampa-area property, or call (813) 767-4022.
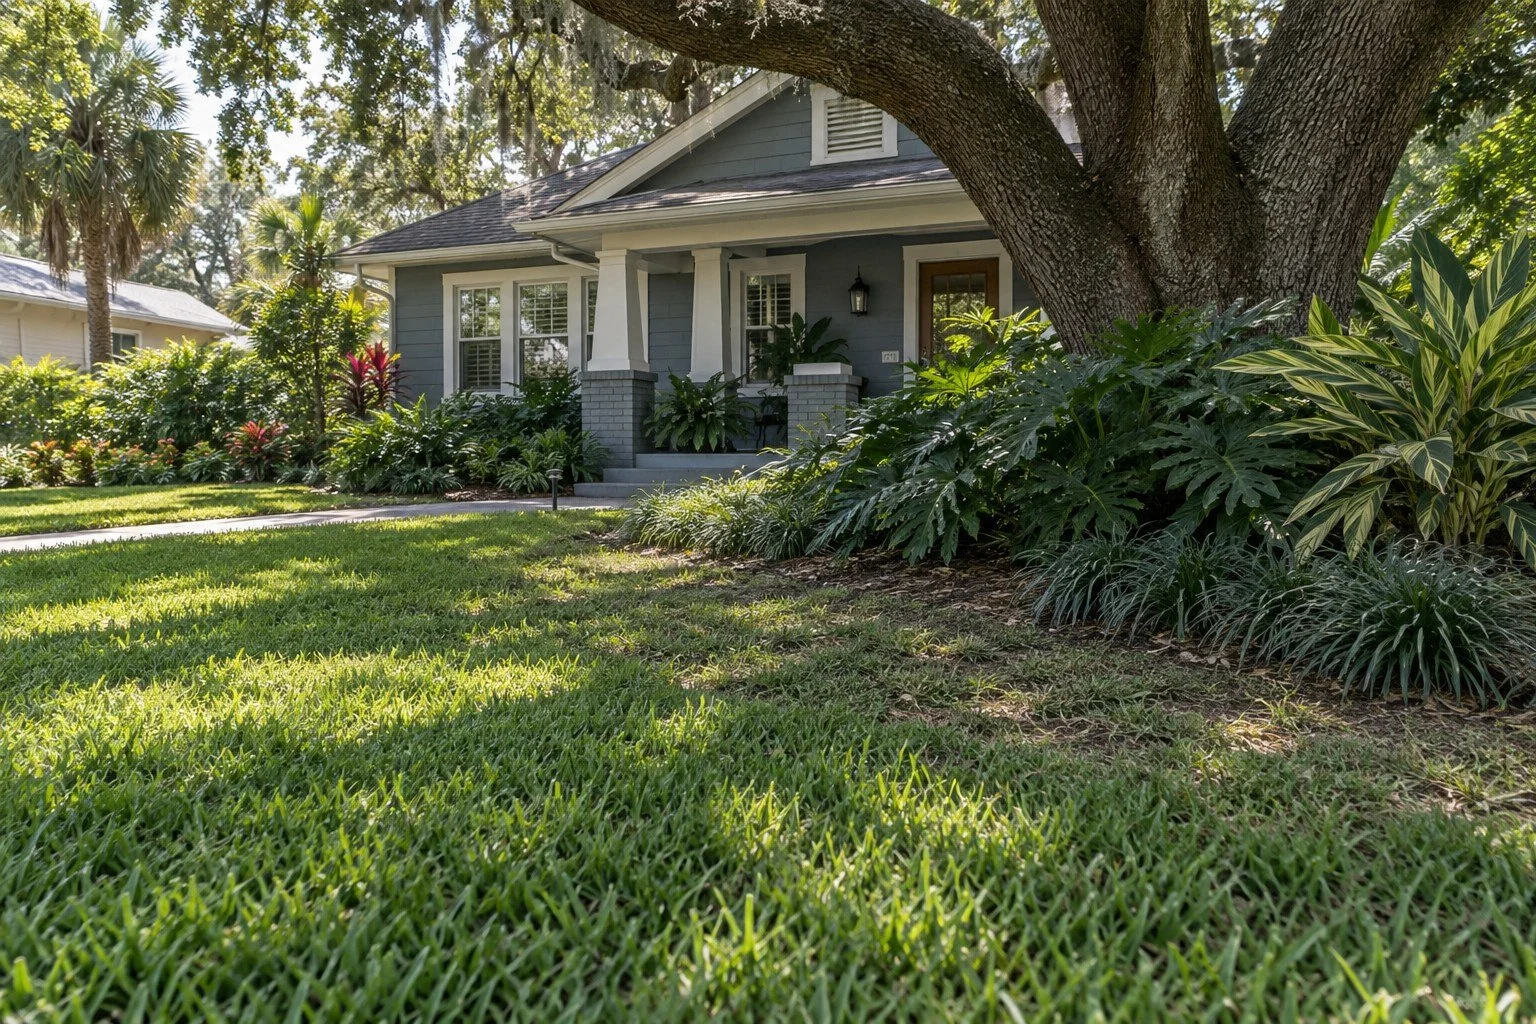
Can St. Augustine Grass Grow in Shade in Tampa?
Learn when a shade-tolerant St. Augustine variety may help and when a planting bed is a better answer than replacing the same failing lawn.
St. Augustine grass can work in some partially shaded locations, but it is not a solution for every shady yard. The variety matters, and areas that stay deeply shaded may be better suited to a planted bed or another ground cover.
Before paying to replace thin grass beneath a mature tree or beside the house, find out why the current grass is struggling. New sod installed into the same conditions can repeat the same problem.
Choose the right St. Augustine variety
UF/IFAS explains that some St. Augustine varieties handle shade better than others. Floratam is less shade tolerant than several alternatives. It also advises against trying to maintain turf under constant or heavy shade. Read the UF/IFAS guide to growing turfgrass in shade.
Ask for the variety name in your sod estimate. “St. Augustine” alone does not tell you whether that variety suits your yard. The choice should also account for what is available, your growing conditions and the care the lawn will receive.
Check how much sunlight the area gets
Observe the affected area in the morning, around midday and later in the afternoon. Note which sections receive direct sun, filtered light or continuous shade. Consider the roofline, fences and neighboring trees as well as the branches of your own trees. Seasonal changes also affect the pattern.
A photograph taken at one bright moment cannot explain the entire day's light. Mark the problem area on a simple sketch so your estimator can compare it with the healthy portions of the lawn.
Check the other causes of thinning
Does foot traffic repeatedly cross the same narrow route?
Are sprinklers missing the area or keeping it too wet?
Is water standing after rainfall?
Is the lawn competing with established tree roots?
Has a pest, disease or maintenance problem been identified?
These checks help narrow down the problem. They do not confirm the cause on their own. UF/IFAS also notes that shaded turf generally needs less water than sunny turf and can be more vulnerable to traffic.
When a bed is the better investment
If the space is too shaded for a dependable lawn, a connected planting bed can give the area around the house or tree a finished look. Keep the useful lawn where conditions support it, rather than leaving narrow strips of grass that are difficult to grow or mow. Avoid disturbing mature tree roots while planning the change.
Compare options through RLC's sod and artificial turf service, and read artificial turf versus natural sod.
For help planning your Lutz or Tampa-area yard, request a free estimate from RLC Lawn & Landscape or call (813) 767-4022.
Mulch vs. Rock: Cost, Heat, Upkeep and Which Fits Your Tampa Landscape
Mulch vs. rock for Tampa Bay yards: 10-year cost calculator, heat, trimming, leaf cleanup, weeds and exactly where each material works best.
Quick answer: choose mulch for planted beds and rock for areas with few plants, like side yards, drip edges and around AC units. Mulch costs less on day one and keeps plants cooler and healthier, but it needs topping up about every year. Rock costs more to install, lasts for decades and often becomes the cheaper option after 4 to 7 years, but it holds heat and makes trimming and leaf cleanup harder.
Mini pine bark mulch and decorative rock are the two most common finishes for Tampa Bay landscape beds, and homeowners go back and forth between them for good reason. One is soft, natural and inexpensive but temporary. The other looks crisp for years but costs more and changes how your plants grow and how the bed is maintained. This guide compares them honestly on cost, heat, plant health, trimming, leaves, weeds, drainage and appearance, and includes a calculator so you can see the 10-year cost with your own numbers.
Mulch vs. rock at a glance
| Factor | Pine bark or cypress mulch | Decorative rock |
|---|---|---|
| Upfront cost | Low | Higher: stone, fabric, excavation and edging |
| Ongoing cost | Refresh about every 6–12 months | Low: occasional top-up and cleanup |
| 10-year cost | Keeps climbing every year | Often lower after year 4–7 |
| Soil temperature | Cooler; shades and insulates roots | Hotter; stone absorbs and radiates heat |
| Plant health | Adds organic matter as it breaks down | Adds nothing; can stress plants in full sun |
| Water use | Holds moisture in sandy soil | Plants often need more water nearby |
| Trimming cleanup | Fine clippings can stay and break down | Clippings fall between stones; must be picked or blown out |
| Leaf drop (oaks, palms) | Leaves blend in and decompose | Leaves show immediately and trap soil over time |
| Weeds | Blocks weeds when kept 2–3" deep | Fabric helps early; weeds return as debris builds up |
| Adding or moving plants | Easy: rake aside and dig | Pull back stone, cut fabric, reset stone |
| Heavy rain | Lighter mulch can float onto walkways | Stays put; good for drainage paths |
| Look | Soft, natural, fades in months | Clean, modern, color lasts for years |
| Changing your mind later | Easy and inexpensive | Removing rock is heavy, slow work |
Rock vs. mulch 10-year cost calculator
Enter your bed size and prices. The chart shows the running total for each material and the year rock breaks even.
Your bed and prices
Prices are example Tampa Bay figures, not a quote. Replace them with the numbers from your estimate for a true comparison.
Total cost over time
Year-by-year table
| Year | Mulch total | Rock total |
|---|
How to read the results
- Installed price is the day-one cost per square foot, including bed prep. For rock, it should include fabric and the depth of stone you want.
- Each refresh is what it costs to top up mulch, usually 1–2 inches, including labor if you hire it out.
- Yearly upkeep for rock covers blowing out leaves and clippings and spot-treating weeds.
- Top-up every 5 years covers stone that sinks, thins or gets kicked into the lawn.
- Break-even is the first year the total spent on rock is equal to or lower than the total spent on mulch.
The default prices are examples only. For an accurate comparison, use the figures from your estimate, and check how much material you need with the mulch and rock calculator.
Why mulch is usually best for planted beds
Organic mulch does more than cover soil. It shades the ground, slows evaporation in Florida's sandy soil, moderates root temperature, suppresses weeds and slowly adds organic matter as it breaks down. The University of Florida's guidance on choosing and installing mulches recommends about two to three inches around established plants and keeping mulch away from their bases.
Mini pine bark is a popular choice because its small, uniform pieces knit together, look tidy next to lawn edges and float less in heavy rain than large nuggets. Cypress and dyed mulches hold color differently and break down at different rates. If you want a specific product, ask for it by name in the estimate, along with the depth.
The trade-off is time and repeat cost. In Tampa's heat, humidity and summer storms, most mulch fades and thins within 6 to 12 months, so it needs to be refreshed about once a year to keep the look and weed control.
The heat problem with rock
This is the factor most homeowners do not expect. Stone absorbs sunlight all day and releases that heat into the soil, the air around your plants and the walls of your home, well into the evening. In full sun on south- and west-facing beds, rock can make a bed noticeably hotter than mulch.
- Stressed plants. Shrubs and groundcovers surrounded by hot stone often wilt faster, scorch at the edges and need more frequent watering.
- More irrigation. Hot, uncovered-by-organic-matter soil dries out faster, especially in sandy soil.
- Reflected heat. Light-colored rock reflects glare and heat onto nearby walls, windows and people using the patio.
- Hot to the touch. Dark stone in summer sun can be uncomfortable for bare feet and pets.
Heat matters less in shaded beds, beds with drought-tolerant plants spaced far apart, and areas with no plants at all. It matters most in sunny foundation beds packed with shrubs.
Trimming, hedges and plants in rock
Every trimming visit creates debris. In a mulch bed, fine hedge clippings and small leaves fall into the mulch and break down, and the bed still looks clean. In a rock bed, the same clippings drop between the stones where a rake cannot reach them without pulling rock along too.
- Clippings have to be hand-picked or blown out after every trim.
- Leaf blowers powerful enough to clear debris can also scatter pea gravel and small river rock into the lawn or pool.
- Debris left in the rock breaks down into a thin soil layer on top of the fabric, which is exactly where weeds start growing.
- Adding a new shrub or replacing a dead one means pulling back stone, cutting the fabric, planting and resetting the rock.
If a bed is full of shrubs that will be trimmed regularly, such as podocarpus, viburnum, ixora or clusia hedges, mulch is usually easier to live with.
Oak leaves, palm fronds and constant blowing
Much of Tampa Bay sits under live oaks, laurel oaks and palms. Oaks drop leaves heavily in late winter and spring, and palms shed fronds, boots and seed stalks year round. Leaves landing in mulch mostly disappear into the bed. Leaves landing in rock stay visible until someone removes them, and a rock bed under a big oak can need blowing out every week or two to look clean. Over time, the fine leaf material that is left behind fills the gaps between stones and supports weeds.
If a bed sits under a large tree, mulch is almost always the more practical choice.
Weeds: fabric helps, then debris takes over
Quality weed barrier fabric under rock stops most weeds for the first few years. What it cannot stop is wind-blown sand, dust and organic debris settling on top of the fabric. Seeds sprout in that thin layer. Rock beds do not become weed-free forever; they just need a different kind of maintenance: occasional hand-pulling or spot treatment and regular debris removal.
Mulch controls weeds by depth. A 2–3 inch layer blocks light to most weed seeds, and refreshing it each year renews that barrier. Fabric generally should not go under mulch, because decomposing mulch on top of fabric becomes a weed bed of its own.
Where rock is the right choice
- Side yards and narrow strips with little or no planting, where mulch would wash out or need constant refreshing.
- Drip edges and downspout paths where roof runoff would blast mulch away.
- Around AC units, pool equipment and utility boxes, where you want a clean surface and no organic debris.
- Along the foundation as a narrow strip, keeping organic mulch away from siding.
- Drainage swales and dry creek beds, where larger river rock slows water and resists erosion.
- Modern or low-water designs with a few sculptural plants spaced widely apart.
- Rental or low-attention properties where no one will refresh mulch every year.
Where mulch is the right choice
- Planted foundation beds with shrubs, flowers and groundcovers
- Beds under oaks, palms and other trees that drop leaves
- Hedges and shrubs that are trimmed regularly
- New plantings that need moisture and cooler roots to establish
- Sunny, west-facing beds where rock would add heat
- Areas you may redesign or replant in the next few years
The hybrid approach most Tampa yards end up with
You do not have to choose one material for the whole property. A common layout is mini pine bark in the front planting beds and tree rings, with river rock in the side yards, along the drip line and around the AC unit. The key is a clean transition: solid edging where the two materials meet, and each area assigned one material with a clear purpose.
The edge is part of the design
Whichever finish you choose, the edge decides how clean the bed looks a year from now. Rock without edging migrates into the lawn and gets thrown by mowers. Mulch without a defined edge washes onto sidewalks during summer storms. Ask whether the estimate includes edging, what type (aluminum, poly, concrete curbing or a hand-cut edge) and how the lawn line will be finished.
What should be written in the estimate?
For mulch
- Product name and size (for example, mini pine bark nuggets)
- Installed depth
- Whether old mulch, weeds and grass will be removed first
- Whether mulch will be pulled back from stems, trunks and the house
- Edging type, if any
For rock
- Stone type, color and size (for example, 1½" white river rock)
- Installed depth and whether the area will be excavated so rock sits level with the lawn
- Weed barrier fabric grade and how seams and plant openings are handled
- Edging type
- Removal and disposal of existing material
Planning a larger renovation? See the recommended order of work for a landscape renovation so finishes go down after planting and irrigation changes.
Not sure which fits each bed?
RLC will walk the property with you, point out where rock makes sense and where mulch will keep plants healthier, and price both so you can compare.
Frequently asked questions
Is rock or mulch cheaper in Florida?
Mulch is cheaper to install, often by a wide margin, but it needs to be refreshed about once a year. Rock costs more up front and very little each year, so in many Tampa Bay yards it becomes the cheaper option somewhere between year 4 and year 7. Use the cost comparison tool with your own prices to see your break-even point.
Does rock make plants hotter?
Yes. Stone absorbs sunlight and releases heat, especially in full sun on south and west exposures. That can raise soil temperature, increase water needs and stress shrubs planted in rock. Organic mulch shades the soil and keeps root zones cooler.
Is it harder to maintain shrubs in rock?
Usually. Hedge clippings, leaves and palm fronds fall between the stones, so they must be hand-picked or blown out. Blowers can also move small rock. In mulch, most fine clippings simply break down with the bed.
Do weeds grow in rock beds?
Over time, yes. Wind-blown soil and leaf litter collect between stones and on top of the fabric, creating a thin layer where weed seeds sprout. Rock beds need occasional weeding or spot treatment, especially under trees.
Should I put rock next to my house?
A rock or gravel strip right beside the foundation can help with drainage and keeps organic mulch away from siding. Keep grading sloped away from the house and make sure stone does not block weep holes or cover the foundation line.
How long does mulch last in Tampa?
In Florida heat, humidity and rain, most mulch fades and breaks down noticeably within 6 to 12 months. Many homeowners top it up once a year, and some twice a year to keep a fresh color.
How long does landscape rock last?
The stone itself lasts decades. Expect to add a small amount every few years where it thins, sinks or gets kicked into the lawn, and to clean out debris regularly.
Can I mix rock and mulch in the same yard?
Yes, and it often works best. Use mulch in planted beds, around trees and in shade, and use rock for side yards, drip edges, AC pads, drainage paths and modern accent areas. Separate them with solid edging so they do not mix.
Should landscape fabric go under mulch?
Generally no. Fabric under mulch traps decomposing mulch on top, where weeds root anyway, and it keeps organic matter from reaching the soil. Fabric belongs under rock and gravel.
Does mulch attract termites?
Mulch does not cause termite infestations, but moist mulch piled against a home can create conditions termites like. Keep mulch pulled back from siding and the foundation, whichever material you choose for the rest of the bed.
Keep planning
- Pine Bark vs. Cypress MulchMini and large pine bark compared with cypress.
- How to Measure for Mulch and RockStep-by-step measuring with a free calculator.
- Rock vs. Mulch Cost ToolFull-screen version of the 10-year comparison.
- Low-Maintenance LandscapingReduce trimming, weeding and lawn frustration.
- All Tools & CalculatorsCalculators, previews and the Showroom.